



 English



A QR code that scans perfectly on a prototype but fails on a production part. A serial number that becomes difficult to read after anodizing. A marking that looks sharp in the sample but fades after repeated handling. These are common reasons manufacturers need to pay closer attention to laser marking.
Fiber laser marking offers a practical way to apply identification, logos, serial numbers, and machine-readable codes directly to manufactured parts. It is particularly useful for metal components that need permanent identification, fine detail, or repeatable markings without labels. The bigger question is whether the mark will remain suitable after machining, surface finishing, assembly, and use.
The sections below focus on where fiber laser marking earns its place in manufacturing, how to choose the marking method, and what engineers should settle before releasing a part for production.
What Are the 7 Main Advantages of Fiber Laser Marking?
Fiber laser marking is a practical choice for many metal parts because it produces detailed identification without mechanical contact or marking consumables. Its advantages are most apparent on components that need permanent product information, compact logos, or repeatable markings across batches.
1. Permanent Identification Without Labels
Fiber laser marking puts the identification directly on the component. There is no adhesive label to peel off, no ink to rub away, and no separate tag to become detached during handling. On machined housings, brackets, and industrial hardware, this makes part numbers and serial numbers easier to retain through assembly and service.
For a component exposed to cleaning, abrasion, or outdoor use, the marking method matters more than the initial appearance. A shallow color mark may be sufficient for a product ID, while an engraved mark is more appropriate when the surface will see repeated wear. Deep engraving is not automatically necessary for every part; it adds processing time and can be excessive for a simple identification requirement.
2. Fine Detail on Small or Space-Constrained Parts
A focused laser beam can produce small text, fine lines, logos, and compact identification codes without requiring space for labels or mechanical marking tools. This is useful on connectors, machined housings, brackets, and components where the available marking area is limited.
There is a practical limit to how much information should be packed into a small area. On a drawing, a tiny QR code may appear to save space, but the finished part may have a textured surface, curved geometry, or limited access for a scanner. I would prioritize a code that can be read reliably over one that simply fits the smallest possible footprint.
3. Repeatable Marks Across Production Batches
Laser marking can reproduce the same logo, text layout, and identification pattern across a batch without replacing physical marking tools. Once the program and positioning method are established, repeat orders are easier to manage.
This is particularly useful for parts with defined branding or identification locations. A fixture is worth considering when the mark needs to sit consistently relative to holes, edges, or assembly features. Without controlled positioning, the marking program may be identical while the actual mark shifts from part to part.
4. No Mechanical Contact With the Workpiece
Fiber laser marking does not press a tool against the component. This avoids marking forces, tool wear, and mechanical contact that can be undesirable on small or finished parts.
It is a good option when the surface should not be scratched by a contact marking tool. However, noncontact does not mean heat-free. Thin walls, narrow sections, and sensitive features still deserve attention. For a precision component, keep the mark away from thin unsupported areas and functional interfaces unless the marking requirement specifically calls for that location.
5. Fewer Marking Consumables
Fiber laser marking requires no ink, solvent, or label stock for the marking operation itself. Compared with inkjet printing or adhesive labels, this removes recurring marking materials and avoids replenishment or adhesion problems.
That advantage is most meaningful in repeat production, where consumable usage and maintenance can accumulate. For one-off prototypes or very small batches, programming, setup, part positioning, and handling may matter more to the quote than consumables. The production quantity should be considered before assuming laser marking will be the cheapest option.
6. Works on Many Metals and Selected Plastics
Fiber lasers are widely used on stainless steel, aluminum, carbon steel, titanium, brass, copper, and selected engineering plastics. They can create surface color changes, contrast marks, shallow etching, or engraved features.
Material selection affects the marking result. Stainless steel can produce dark marks through controlled surface heating, while anodized aluminum is commonly marked by removing or altering the anodized layer to expose the underlying material. Copper and brass are more reflective, and some plastics may discolor, melt, or produce poor contrast. If the mark is cosmetic, material and finish samples are useful before committing to a specific appearance.
7. Simplifies Identification of Individual Parts
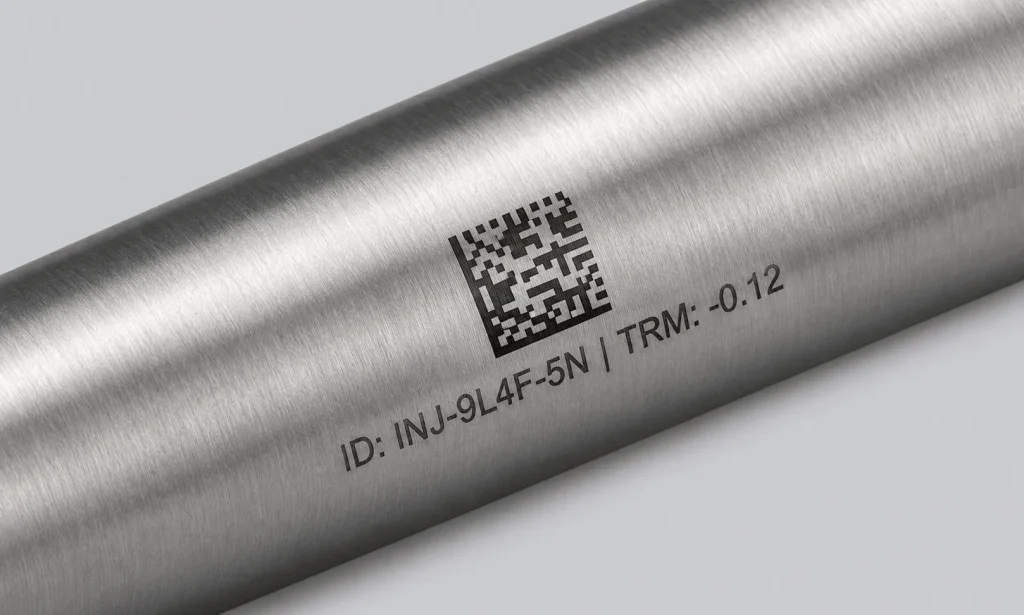
Serial numbers, lot codes, QR codes, and Data Matrix codes can be marked directly onto a component, reducing reliance on external labels during assembly, service, and product identification.
This is especially useful when parts look similar but belong to different revisions, batches, or assemblies. Marking location should be accessible after assembly and should not be hidden by brackets, fasteners, or adjacent components. If the code is used for traceability, its format and assignment need to be established in the production process.
How Does Fiber Laser Marking Produce Precise Marks?
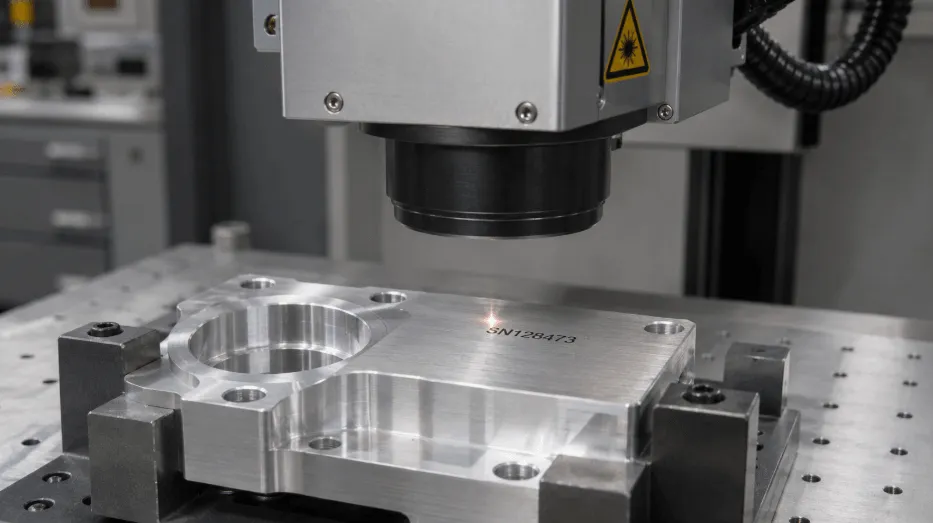
Fiber laser marking typically uses a wavelength around 1064 nm to deliver concentrated energy to the workpiece. The laser changes the surface through localized heating, oxidation, or material removal. The selected parameters determine whether the result is a color change, a shallow etched mark, or deeper engraving.
The beam is directed across the marking area using a scanning system. Focus, power, pulse settings, speed, and spacing influence the final appearance. Deep engraving takes longer because more material must be removed, and repeated passes increase thermal input.
For most part identification, I would start with the shallowest marking method that meets the durability and readability requirements. Extra depth adds little value to a simple serial number if the part is not exposed to severe wear. On thin-wall or precision components, unnecessary material removal and localized heating are better avoided.
Which Materials and Surface Conditions Affect Fiber Laser Marking Results?
Fiber laser marking works well on many metals, but the finished appearance can change considerably between alloys and surface treatments. A mark developed on raw metal may look completely different after anodizing, blasting, polishing, or painting. The material and final finish should therefore be treated as part of the marking specification.
| Material | Typical Marking Results | Engineering Considerations |
| Stainless steel | Dark marks, surface etching, or engraving | Surface condition and marking method influence appearance and corrosion behavior |
| Aluminum | Contrast marking or engraving | Alloy and surface treatment change contrast |
| Anodized aluminum | High-contrast marks through localized coating removal | Exposed aluminum creates contrast against the anodized surface |
| Carbon and tool steel | Dark marks, etching, or engraving | Heat treatment and surface condition affect results |
| Titanium | Identification marks and surface color changes | Mark appearance varies with process parameters |
| Brass and copper | Surface marks or engraving | Reflectivity can complicate laser processing |
| Engineering plastics | Marks on compatible grades | Pigments, additives, and heat sensitivity influence contrast |
One point worth checking early is whether the part will be marked on raw material or after finishing. If the mark is required on a cosmetic surface, approval based on an unfinished coupon can be misleading. Use the intended material and surface condition when appearance is important.
Annealing vs. Etching vs. Engraving: Which Marking Method Should You Choose?
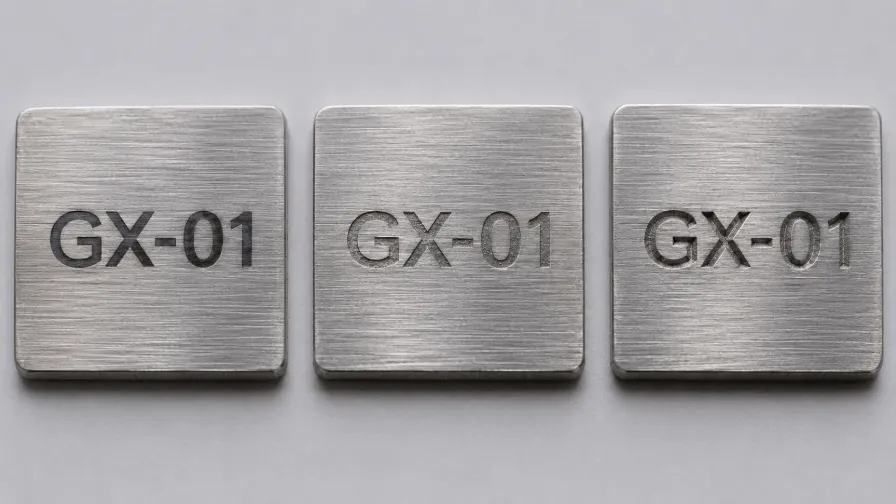
The marking method determines whether the surface changes color, loses a thin layer of material, or receives a recessed feature. These methods are not interchangeable. For most part identification, shallow marking is enough; engraving is better reserved for cases where physical depth or additional wear resistance is required.
| Marking Method | How It Works | Best Suited For | Main Consideration |
| Annealing | Heat changes the surface color without intentionally removing material | Dark identification marks on suitable metals | Surface appearance and corrosion behavior |
| Etching | Removes or modifies a shallow layer of material | Text, logos, and identification | Mark depth and surface texture |
| Deep engraving | Removes more material to create a recessed mark | Identification exposed to greater physical wear | Processing time and surface impact |
| Coating removal | Removes coating to reveal the underlying material | Marks on anodized, painted, or coated components | Exposed substrate and appearance |
For a cosmetic aluminum housing, a controlled contrast mark is usually a better starting point than deep engraving. For a part handled frequently or exposed to abrasion, engraving may be justified. Choose the depth for the part’s service conditions, not simply because a deeper mark looks more substantial.
Fiber Laser Marking vs. Other Marking Methods: Which Is Better for Your Part?
Fiber laser marking is a strong option for metal components that need fine, permanent identification. Other methods can be more suitable for nonmetallic materials, heat-sensitive surfaces, variable-data printing, or marks that require a specific depth. The decision becomes easier when the marking requirement is defined first.
| Process | Best Suited For | Advantages | Limitations |
| Fiber laser | Metals and selected plastics | Fine detail, permanent marks, no marking consumables | Material response and heat must be controlled |
| CO₂ laser | Many nonmetallic materials | Effective on a range of plastics and organic materials | Less suitable for directly marking many bare metals |
| UV laser | Selected plastics and heat-sensitive applications | Fine marks with reduced thermal impact in suitable applications | Material compatibility and equipment cost |
| Dot peen | Robust industrial identification | Deep, mechanically formed marks | Contact force, noise, and surface deformation |
| Inkjet | Fast variable codes and production identification | Flexible coding and rapid changes | Ink adhesion, wear, and consumables |
| Chemical etching | Selected metal parts and batch marking | Consistent marks over defined areas | Chemicals, masking, and waste management |
For metal housings, brackets, and machined components, fiber laser marking is usually one of the first processes I would evaluate. If the material is plastic, the surface is heat-sensitive, or the code needs to remain readable on a difficult geometry, test another marking method before locking the drawing.
Should Laser Marking Be Done Before or After Surface Finishing?
The marking sequence can determine whether the mark remains visible, whether coating is removed, and whether the exposed surface meets the part’s appearance requirements. On anodized aluminum, for example, marking after anodizing can remove the colored layer locally. Marking before anodizing may leave the mark covered or change its appearance during finishing.
| Surface Finish | Marking Sequence | What to Consider |
| Anodizing | Before anodizing | Mark may be covered or altered by the anodizing process |
| Anodizing | After anodizing | Laser may remove the anodized layer and expose aluminum |
| Powder coating | Before powder coating | Mark may be concealed by the coating |
| Powder coating | After powder coating | Coating removal exposes the substrate |
| Plating | Before plating | Plating may change or conceal the mark |
| Plating | After plating | Marking may remove plating locally |
| Polishing or blasting | Before finishing | Surface treatment may alter or remove a shallow mark |
| Polishing or blasting | After finishing | Marking contrast depends on the final surface texture |
In the eFoil mast project described later, Mastars machined the AL 6061-T5 profile, polished and sandblasted it, applied hard anodizing, and then laser etched the branding. That sequence was part of achieving the finished appearance. It also illustrates why the marking operation should be decided alongside the finish—not added after the finishing route has already been approved.
For precision parts, the other concern is where the mark sits. Threads, bores, sealing faces, mating interfaces, and locating features should not become unintended marking or coating-removal areas.
What Should Engineers Specify for Laser Marking on a Manufacturing Drawing?
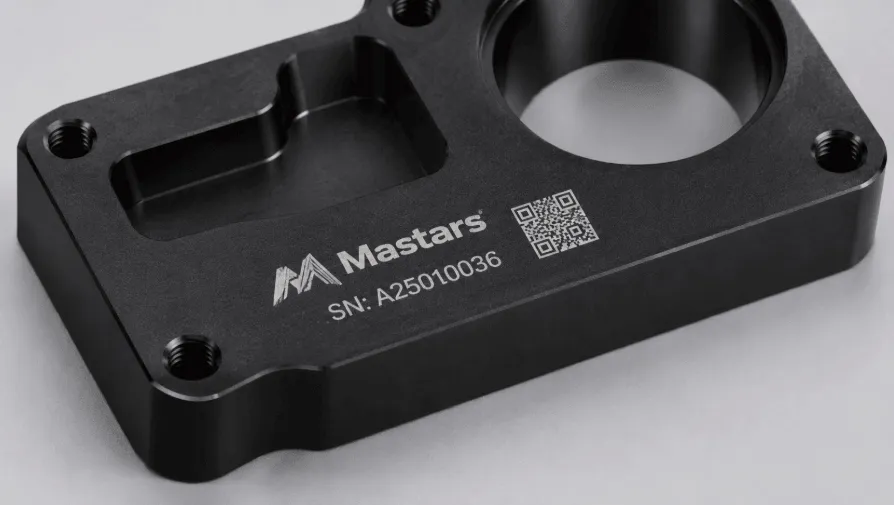
A useful laser marking callout defines the location, orientation, content, and acceptance requirements. “Laser mark part number” is rarely enough when the part has a limited marking area, a cosmetic finish, or a code that must be scanned after assembly. Clear drawing information avoids unnecessary clarification and rework.
Include the following where applicable:
- Location and orientation: Define the position relative to drawing datums, holes, edges, or other recognizable features.
- Mark content: Provide text, serial-number format, logo artwork, QR code, or Data Matrix data.
- Size: Specify character height, line width, code dimensions, or marking area.
- Surface condition: State whether marking is required before or after anodizing, plating, painting, polishing, or blasting.
- Appearance: Define color, contrast, depth, and acceptable cosmetic variation where important.
- Functional restrictions: Identify surfaces where marking must not interfere with fit, sealing, threads, or locating features.
- Inspection: Specify visual checks, dimensional checks, or code scanning when required.
For machine-readable codes, don’t approve the design from a screen preview alone. Code size, quiet zone, curvature, contrast, and scanner distance can all affect readability. A code that fits the drawing but cannot be reliably scanned on the finished part needs to be revised before production.
How Does Fiber Laser Marking Support Traceability in Production?
Laser marking can give each component a permanent identifier that connects it to a lot, serial number, drawing revision, inspection record, or service history. This is useful when visually similar parts need to be distinguished throughout assembly and after delivery.
For production, keep the identification format and position consistent wherever possible. Operators should be able to locate the mark without rotating the part through several orientations or searching near assembled features. If individual serial numbers are used, the assignment process also needs to prevent duplicate or incorrect numbers.
Laser marking is commonly used for identification in traceability systems, but the marking itself does not establish the complete record. Code assignment, data storage, verification, and retrieval still need to be handled by the manufacturing or quality system.
How Does Laser Marking Fit into a Custom Manufacturing Workflow?
Marking is frequently one of the last operations on a finished component, which means it can be affected by everything that comes before it. Machining, polishing, blasting, coating, and assembly can change the surface or cover the mark. Planning the sequence early avoids having to redo an approved marking layout after a finishing change.
A typical workflow includes:
- CAD and drawing review: Confirm marking location, content, critical dimensions, finish, and functional surfaces.
- Part manufacturing: Produce the component through CNC machining, sheet metal fabrication, molding, casting, or another selected process.
- Surface finishing: Apply anodizing, polishing, blasting, plating, painting, or the specified finish.
- Laser marking: Apply the approved content and marking method at the planned stage.
- Final inspection: Check marking location, appearance, dimensions where relevant, and readability against the acceptance criteria.
A good example is Mastars’ premium eFoil wing mast project for Flite. The mast is a long aluminum structural component with a hydrodynamic profile, threaded interfaces, and alignment features for the board and foil assembly. The manufacturing route used AL 6061-T5 CNC machining, polishing, controlled sand blasting, hard black anodizing, and laser etching.
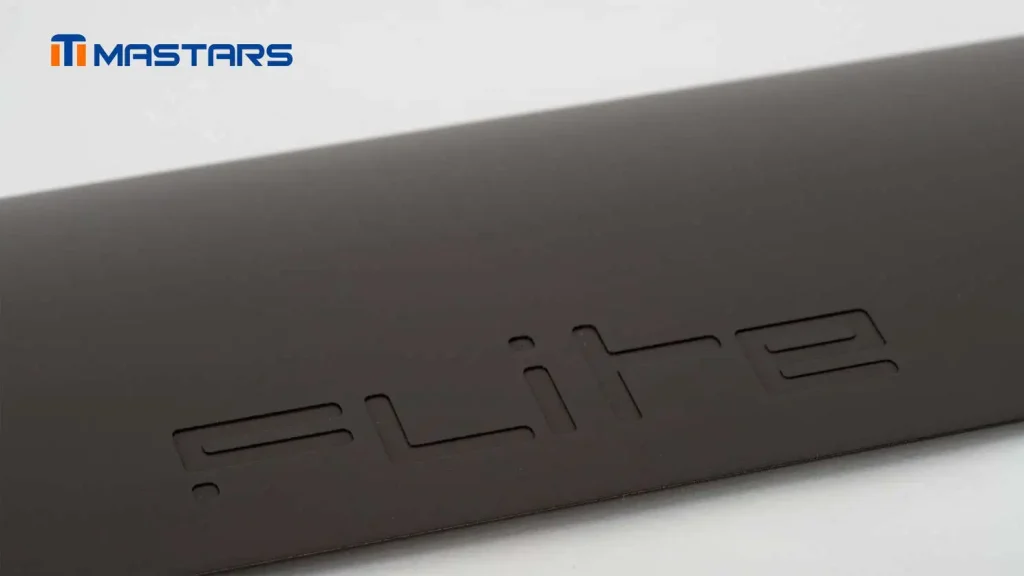
The sequence mattered because the project had functional and visible requirements on the same component. Machining established the profile and interfaces; polishing and blasting prepared the surface texture; hard anodizing provided the final surface; and laser etching added branding. Coordinating these operations in one route also reduced handoffs between processes that could otherwise complicate appearance and dimensional control.
For parts that require coordinated manufacturing and marking, CNC machining and surface finishing and laser marking can be planned together rather than treated as separate supplier handoffs.
What Are the Limitations of Fiber Laser Marking?
Fiber laser marking is not suitable for every material or surface. Some plastics respond poorly to the wavelength, reflective metals can complicate processing, and thin sections may be more sensitive to heat. A flat coupon is also easier to mark than a curved part with limited access or inconsistent focus.
The situations that deserve extra attention are:
- Material compatibility: Transparent materials and some plastics are poorly suited to common fiber laser wavelengths.
- Reflective metals: Copper, brass, and other reflective surfaces can require additional process consideration.
- Thin walls: Local heating can affect appearance or dimensional stability on delicate sections.
- Coated surfaces: Marking can remove coating and expose the base material.
- Deep engraving: More material removal adds processing time and can affect the surrounding surface.
- Curved geometry: Focus and code readability can become difficult across curved or uneven surfaces.
For a cosmetic logo, color and edge definition may be the deciding criteria. For a serial number, readability and permanence matter more. For a QR code, scan performance is the real acceptance requirement. These are different marking jobs, and they should not be evaluated using the same sample or approval criteria.
Is Fiber Laser Marking Cost-Effective for Custom Manufactured Parts?
Fiber laser marking can lower recurring marking costs by removing ink, labels, and some mechanical tooling. Its cost advantage is usually clearer in repeat production than in a one-off prototype, where setup, positioning, programming, and handling may represent a significant part of the total job.
| Cost Factor | How It Affects the Quote |
| Mark complexity | Fine graphics and dense codes require more processing and setup |
| Mark depth | Deeper engraving generally increases processing time |
| Quantity | Setup costs are spread across more parts in larger batches |
| Variable data | Individual serial numbers or changing codes require data preparation |
| Surface finish | Finished surfaces may require extra positioning or process trials |
| Inspection | Readability, location, and appearance checks add time where required |
For a prototype, I would first confirm that the mark is in the right place and has the required appearance before spending time optimizing the cycle. For repeat orders, stable positioning and a standardized marking program are more valuable because they reduce variation between batches. If marking is part of a larger manufacturing project, compare the complete route—machining, finishing, marking, and inspection—not just the laser operation by itself.
Conclusion
Fiber laser marking is particularly useful for metal parts that need permanent identification, fine detail, or repeatable marks without labels or mechanical tool contact. For custom components, the decisions that deserve attention early are the marking method, its position, and the sequence relative to surface finishing. A mark that looks good on raw material may not survive the finishing route as intended. Set these requirements while the part and manufacturing process are still being planned, and marking is much less likely to become a late-stage rework issue.
Need Laser Marking on a Custom Part?
Mastars can coordinate laser marking with CNC machining, other manufacturing processes, and surface finishing. Planning these operations together helps avoid conflicts between marking locations, cosmetic requirements, and functional features.
Send your CAD file, material, marking artwork or text, critical dimensions, and surface requirements. Rough information is fine to start.
Fiber Laser Marking FAQs

Yes. Fiber laser marking can produce permanent identification on many materials. A surface color change and a deeper engraving have different resistance to wear, so choose the mark depth for the component's service conditions.
Yes. Fiber lasers can mark anodized aluminum by removing or altering the anodized layer to create contrast. This is commonly used for logos and identification on anodized parts.
It can. Some marking methods change the stainless steel surface through heat or material removal. For components exposed to corrosive environments, the marking method and surface requirements should be reviewed together.
Yes. Fiber lasers can mark QR codes and Data Matrix codes on suitable materials. If the code is used for scanning or traceability, readability should be checked on the finished component.
If the mark needs to contrast with the coating, marking after finishing is often a practical choice because the laser can expose the underlying material. Marking before finishing may be appropriate for other requirements, but the coating can conceal or alter the mark. Define the sequence before production.
 Headquarters


