


FAQ About Vacuum Casting


1. Basic Cognition
1.1 What is Vacuum Casting?
Vacuum Casting, also known as vacuum replication, is a low-volume manufacturing process used to produce high-precision plastic or resin parts by pouring liquid material into a silicone mold under vacuum conditions. The process typically starts with a master model (made via 3D printing, CNC machining, or handcrafting), which is used to create a silicone mold. Liquid casting material (e.g., polyurethane resin) is then poured into the mold in a vacuum chamber to eliminate air bubbles, followed by curing and demolding. It is ideal for small-batch production (10-100 pieces) of prototypes, functional parts, or customized components, balancing precision, surface quality, and cost.
1.2 What are the core advantages of Vacuum Casting compared to other processes?
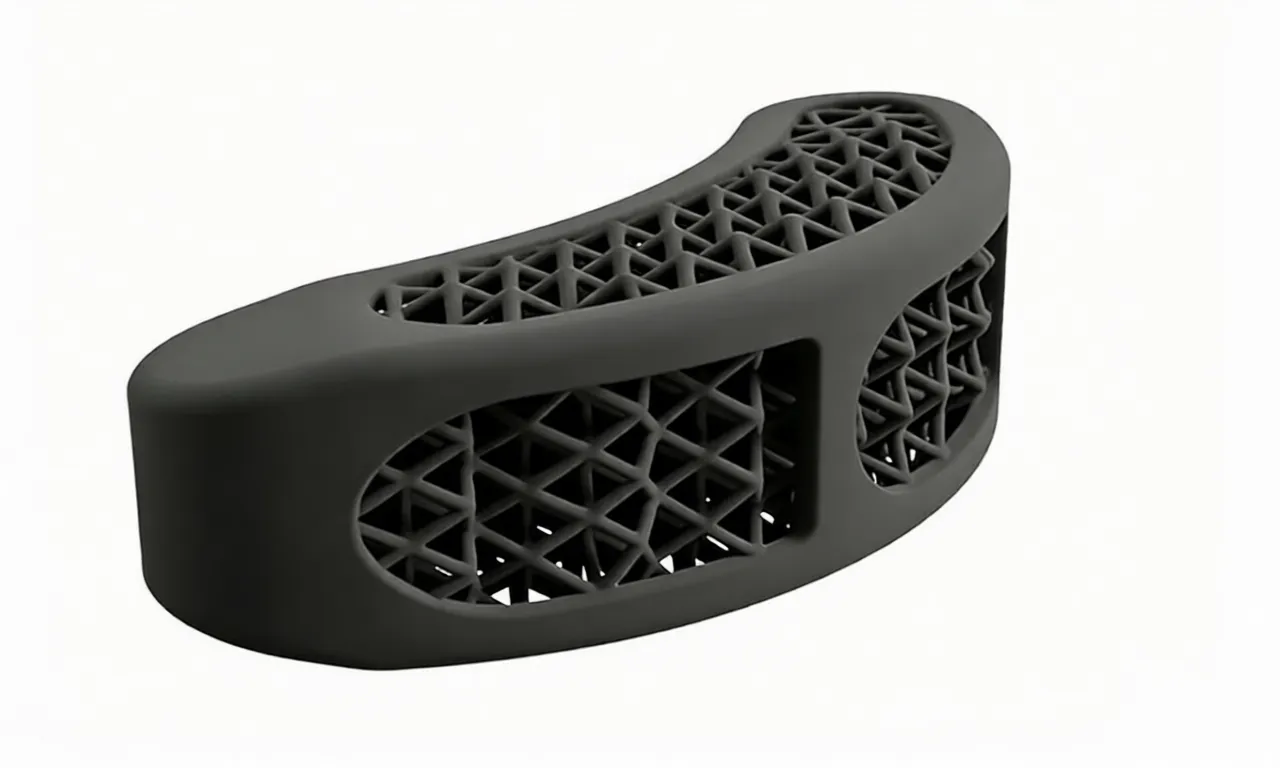
Key advantages include: ① Low Tooling Cost: Silicone molds are cheaper and faster to produce than metal molds (e.g., injection molding), suitable for small batches; ② High Precision & Surface Quality: Vacuum environment eliminates air bubbles, ensuring smooth surfaces and accurate replication of master model details (tolerance up to ±0.05mm); ③ Material Versatility: Compatible with various resins to simulate properties of engineering plastics (ABS, PC, PP) or elastomers; ④ Fast Lead Time: Silicone mold production takes 1-3 days, and each casting cycle is short (hours), enabling rapid prototyping and small-batch delivery; ⑤ Design Flexibility: Can produce complex structures (hollows, undercuts, internal channels) that are difficult for traditional processes.
1.3 In which industries is Vacuum Casting commonly applied?
It is widely used in industries requiring small-batch, high-quality parts: ① Automotive: Prototypes of interior trim, bumpers, and electronic components; ② Consumer Electronics: Casings for smartphones, headphones, and wearable devices; ③ Medical Devices: Customized surgical tools, diagnostic equipment housings (using biocompatible resins); ④ Aerospace: Low-volume functional parts and cabin components; ⑤ Toys & Crafts: High-detail figurines, customized models, and artworks; ⑥ Industrial Machinery: Spare parts, gaskets, and prototypes of mechanical components.
2. Materials and Mold Technology
2.1 What materials are commonly used in Vacuum Casting?
The main casting materials are polyurethane (PU) resins, categorized by performance to simulate different plastics: ① Rigid Resins: Simulate ABS, PC, or nylon, with high strength and rigidity, suitable for structural parts and housings; ② Flexible Resins: Shore hardness 0-90A, simulating rubber, TPU, or silicone, used for gaskets, seals, and soft touch parts; ③ Transparent Resins: High light transmittance, simulating PMMA (acrylic) or PC, ideal for lenses and transparent casings; ④ Special Resins: Flame-retardant, heat-resistant, or biocompatible resins for industry-specific needs. Additionally, fillers (glass fiber, carbon fiber) can be added to enhance mechanical properties.
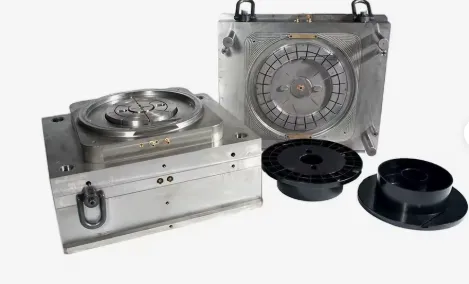
2.2 How to make a silicone mold for Vacuum Casting, and what is its service life?
Silicone mold production steps: ① Prepare the master model (ensure smooth surface and no defects); ② Build a mold frame around the model and fix the parting line; ③ Mix liquid silicone (base + curing agent) and pour it around the model, then place in a vacuum chamber to remove bubbles; ④ Cure the silicone at room temperature (or low temperature) for 4-24 hours; ⑤ Demold and trim the mold, adding vents and pouring channels. Service life: Typically 10-50 pieces per mold, depending on material hardness (softer resins extend mold life), mold complexity, and operating conditions. High-temperature curing or abrasive materials may reduce life to 5-20 pieces.
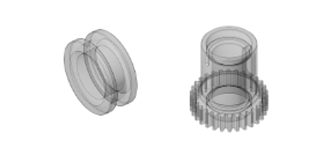
2.3 What requirements does the master model have for Vacuum Casting?
Key requirements: ① Precision & Surface Quality: The master model’s precision directly determines the casting part’s accuracy—surface roughness Ra ≤ 0.8μm is preferred, with no scratches, bubbles, or burrs; ② Material Compatibility: Master models should be resistant to silicone and casting materials (common materials: 3D printed resin, CNC machined plastic/metal, or polished wood); ③ Draft Angle: Add 1-3° draft angles on vertical surfaces to facilitate demolding and avoid mold damage; ④ Undercuts: Minimize undercuts; if unavoidable, use split molds or collapsible cores; ⑤ Size Compensation: Account for material shrinkage (0.1-0.5% for PU resins) when designing the master model to ensure final part dimensions are correct.
3. Process Control and Precision Assurance
3.1 What factors affect the precision and surface quality of vacuum cast parts?
Main influencing factors: ① Master Model Quality: As the replication benchmark, defects on the model will be transferred to cast parts; ② Silicone Mold Quality: Uneven silicone thickness, insufficient curing, or poor vent design cause dimensional deviations and bubbles; ③ Vacuum Parameters: Insufficient vacuum degree (ideal: -0.095 to -0.1MPa) or short holding time leads to residual bubbles; ④ Casting Material: Material shrinkage rate, mixing ratio (usually 1:1 or 2:1 by weight), and curing temperature affect precision; ⑤ Pouring & Curing: Uneven pouring speed, improper curing temperature (20-60℃), or insufficient curing time cause warpage and surface defects.
3.2 How to set key process parameters (vacuum degree, curing temperature, mixing ratio)?
Parameter setting guidelines: ① Vacuum Degree: Maintain -0.095 to -0.1MPa during mold preparation and pouring to fully remove air bubbles; hold for 5-15 minutes after pouring to eliminate residual bubbles; ② Mixing Ratio: Strictly follow the resin manufacturer’s ratio (weight ratio is more accurate than volume ratio) and mix thoroughly for 3-5 minutes to avoid incomplete curing; degas the mixed resin separately if needed; ③ Curing Temperature: Room temperature (20-25℃) curing takes 4-8 hours; heating to 40-60℃ shortens curing time to 1-3 hours, but avoid overheating (may cause material degradation); ④ Pouring Speed: Pour slowly along the mold wall to prevent air entrapment, ensuring the resin fills all cavities and details.
3.3 How to handle undercuts and complex structures in Vacuum Casting?
Solutions for complex structures: ① Split Silicone Molds: Design multi-part molds (2-4 pieces) for parts with undercuts, using parting lines to separate the mold without damaging the part during demolding; ② Collapsible Cores: For internal undercuts or deep cavities, use soluble cores (e.g., wax, water-soluble resin) that can be removed after curing; ③ Flexible Silicone Selection: Use high-elasticity silicone (Shore A 20-40) to stretch the mold slightly during demolding of small undercuts; ④ Master Model Optimization: Modify the model design to minimize undercuts (e.g., replace sharp undercuts with rounded edges) without affecting functionality.
4. Fault Troubleshooting
4.1 Why do cast parts have air bubbles, and how to resolve this?
Causes: ① Insufficient vacuum degree or holding time; ② Resin mixing is too violent, entraining air; ③ Silicone mold has no vents or insufficient venting; ④ Resin contains moisture (absorbed from the air). Solutions: ① Increase vacuum degree to -0.098 to -0.1MPa and extend holding time by 5-10 minutes; ② Mix resin gently and slowly, then degas the mixed resin in a vacuum chamber before pouring; ③ Add vents (diameter 0.5-1mm) at the highest points of the mold and thick-walled areas; ④ Store resin in a dry, sealed container with desiccant; pre-dry resin at 40-50℃ for 1-2 hours if moist.
4.2 How to solve surface defects (scratches, unevenness, or dullness) on cast parts?
Causes: ① Master model has surface defects (scratches, roughness); ② Silicone mold surface is contaminated or damaged; ③ Resin curing is uneven; ④ Demolding is too rough, scratching the part. Solutions: ① Polish the master model to Ra ≤ 0.4μm, apply a release agent (if needed) to ensure smoothness; ② Clean the silicone mold with isopropyl alcohol before pouring, replace the mold if it is severely worn or scratched; ③ Control curing temperature uniformly, avoid local overheating; ④ Apply a thin layer of mold release agent on the mold cavity, demold gently using tools (e.g., wooden sticks) to avoid scratching.
4.3 Why do cast parts have dimensional deviations or warpage?
Causes: ① Master model has no shrinkage compensation; ② Silicone mold deforms during curing or use; ③ Resin curing is uneven, causing internal stress; ④ Demolding too early (resin not fully cured). Solutions: ① Add 0.1-0.5% shrinkage compensation to the master model based on resin type; ② Use high-strength silicone (Shore A 50-70) and ensure uniform silicone thickness to prevent mold deformation; ③ Extend curing time or use gradient heating to reduce internal stress; ④ Wait for complete curing (test hardness with a durometer) before demolding; use fixtures to fix the part during curing if necessary.
4.4 What causes incomplete curing of cast parts, and how to fix it?
Causes: ① Incorrect resin mixing ratio (too much/too little curing agent); ② Mixing is insufficient, leading to uneven distribution of the curing agent; ③ Curing temperature is too low or time is too short; ④ Resin has expired or been contaminated. Solutions: ① Use a precision scale to measure the resin and curing agent, strictly following the manufacturer’s ratio; ② Mix thoroughly for 3-5 minutes, scraping the bottom and sides of the container to ensure uniformity; ③ Increase curing temperature to 40-50℃ and extend curing time; ④ Replace with fresh resin and store it properly (avoid direct sunlight and high temperature).
5. Cost and Efficiency Optimization
5.1 What factors affect the cost of Vacuum Casting?
Main cost factors: ① Master Model Cost: Determined by material (3D printed resin is cheaper than CNC metal) and complexity; ② Silicone Mold Cost: Depends on mold size, complexity (split molds cost more than single-piece molds), and silicone grade; ③ Resin Cost: Special resins (transparent, flame-retardant) are more expensive than standard PU resins; ④ Labor & Process Cost: Including mold making, pouring, curing, and post-processing; ⑤ Batch Size: Unit cost decreases with batch size (mold cost is amortized over more parts), but exceeds 100 pieces may be more cost-effective with injection molding.
5.2 When is Vacuum Casting more cost-effective than injection molding?
Vacuum Casting is cost-effective in: ① Small-Batch Production (10-100 pieces): Avoids high metal mold costs (injection molding molds cost thousands to tens of thousands of dollars); ② Rapid Prototyping: Short mold lead time (1-3 days) vs. injection molding (2-4 weeks), suitable for urgent projects; ③ Customized or Low-Volume Runs: No need for mass production tooling, flexible for design modifications; ④ Complex Structures: Lower cost for parts with undercuts or internal channels (injection molding requires complex molds). Injection molding is preferred for batches >500 pieces, as higher efficiency offsets tooling costs.
5.3 How to improve production efficiency of Vacuum Casting?
Efficiency optimization methods: ① Multi-Cavity Molds: Design silicone molds with multiple cavities (2-8 cavities) to produce multiple parts per cycle; ② Accelerate Curing: Use high-temperature curing (40-60℃) or fast-curing resins to shorten cycle time; ③ Automate Processes: Use automatic vacuum casting machines to reduce manual operation (pouring, degassing); ④ Optimize Post-Processing: Integrate trimming, polishing, and painting into a streamlined workflow; use tools (e.g., trimming dies) to speed up trimming; ⑤ Batch Mold Making: Produce multiple silicone molds simultaneously for large small-batch orders (e.g., 50-100 pieces) to parallelize production.
6. Safety and Operation Specifications
6.1 What are the core safety precautions for Vacuum Casting?
Key safety notes: ① Chemical Safety: Most PU resins and silicone contain volatile organic compounds (VOCs)—operate in a well-ventilated area, wear gloves, goggles, and a respirator; avoid skin contact (resins may cause irritation); ② Fire Prevention: Resins and curing agents are flammable—keep away from open flames, heat sources, and static electricity; store in a cool, dark place; ③ Vacuum Equipment Safety: Regularly inspect the vacuum chamber and pipelines for air leaks; do not open the chamber until pressure returns to normal to avoid injury; ④ Waste Disposal: Dispose of leftover resin, curing agent, and used silicone according to local environmental regulations (do not pour down drains); ⑤ Demolding Safety: Use tools instead of hands to demold (molds may be hot, and sharp edges can cause cuts).
6.2 How to maintain silicone molds to extend their service life?
Mold maintenance measures: ① Cleaning: After each use, clean the mold cavity with isopropyl alcohol to remove residual resin; avoid using sharp tools that may scratch the cavity; ② Release Agent: Apply a thin layer of silicone-compatible release agent before each pouring to reduce friction and prevent sticking; ③ Storage: Store molds in a dry, cool place (20-25℃) away from direct sunlight and high temperature; avoid folding or compressing the mold; ④ Repair: Minor scratches on the mold can be repaired with liquid silicone; replace the mold if there is severe deformation, tearing, or cavity wear; ⑤ Avoid Contamination: Prevent resin, oil, or dust from contaminating the mold surface, which may affect part quality and mold life.
Hot Articles

Hot Tags
Stay Connected!


Manufacturing on Demand
Please fill in the following information to obtain plan details (information is confidential and not disclosed publicly), we will contact you within 24 hours, please keep your phone available!
Upload a 3D/2D model to see instant pricing, lead time, and DFM feedback.