


FAQ About 3D Printing


1. Basic Cognition
1.1 What is 3D Printing?
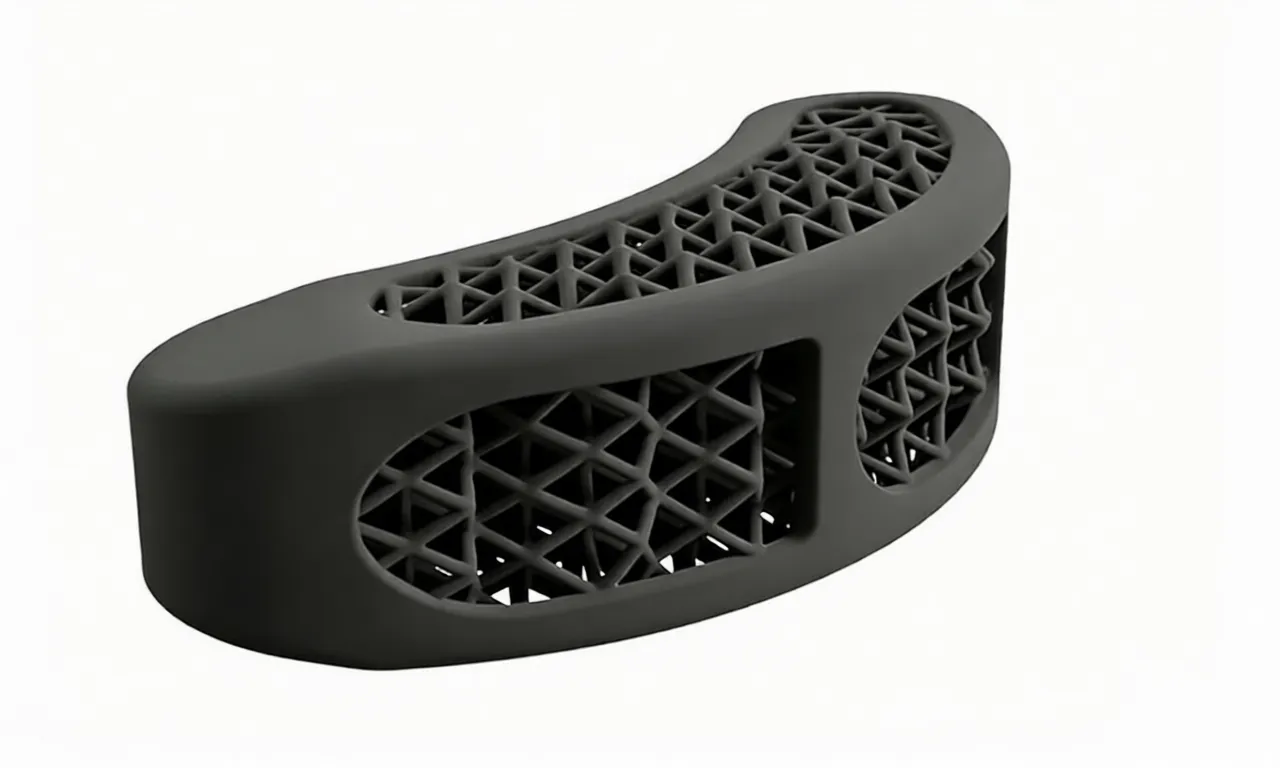
3D Printing, also known as Additive Manufacturing (AM), is a process that constructs three-dimensional objects by layer-by-layer deposition of materials (such as plastic, metal, resin, etc.) based on a digital 3D model. Unlike traditional subtractive manufacturing (e.g., CNC milling, turning) that removes material from a solid block, 3D printing is additive, which can create complex structures (e.g., hollow parts, internal channels, irregular contours) that are difficult or impossible to achieve with traditional methods. It is widely used in prototyping, customized production, aerospace, medical devices, automotive, and other fields.
1.2 What are the main types of 3D printing technologies?
The most common 3D printing technologies include: ① Fused Deposition Modeling (FDM): Melts thermoplastic filaments and extrudes them layer by layer, low cost, suitable for hobbyists and prototyping; ② Stereolithography (SLA): Uses ultraviolet (UV) light to cure liquid photosensitive resin layer by layer, high precision, ideal for fine prototypes and artistic works; ③ Selective Laser Sintering (SLS): Uses a laser to sinter powdered materials (e.g., nylon, metal) into solid parts, no need for support structures, suitable for functional parts; ④ Selective Laser Melting (SLM): Similar to SLS but fully melts metal powders (e.g., titanium alloy, stainless steel) to form dense parts, widely used in aerospace and medical fields; ⑤ Binder Jetting (BJ): Sprays a binder onto powder materials to bond them layer by layer, suitable for large-scale metal or ceramic parts.
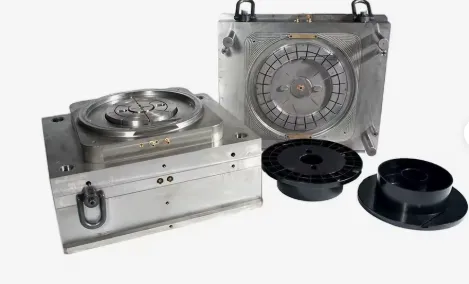
1.3 What is the difference between 3D printing and traditional manufacturing?
The core differences lie in processing principles, applicable scenarios, and cost characteristics: ① Processing Principle: 3D printing is additive (layer-by-layer deposition), while traditional manufacturing is mostly subtractive (material removal) or formative (e.g., injection molding); ② Complexity Adaptability: 3D printing can easily produce complex structures with almost no additional cost, while traditional methods have high difficulty and cost for complex parts; ③ Batch Production: Traditional manufacturing (e.g., injection molding) is more cost-effective for mass production, while 3D printing is suitable for small batches, customization, and prototyping; ④ Material Waste: 3D printing generates less material waste (only uses required materials), while subtractive manufacturing produces more scrap; ⑤ Lead Time: 3D printing has shorter lead time for small batches (no need for molds), while traditional manufacturing requires mold development and debugging.
2. Material and Process Adaptation
2.1 What materials can be used for 3D printing?
3D printing materials cover a wide range of categories, including: ① Plastics: The most commonly used, such as PLA (environmentally friendly, easy to print), ABS (high impact resistance, suitable for functional parts), PETG (translucent, good toughness), nylon (wear-resistant, used in SLS), and PEEK (high temperature resistance, for medical and aerospace); ② Metals: Titanium alloy, stainless steel, aluminum alloy, cobalt-chromium alloy, etc., mainly used in SLM and BJ technologies for high-strength parts; ③ Resins: Photosensitive resin (for SLA, high precision, smooth surface), flexible resin, and casting resin; ④ Others: Ceramics, wood-plastic composites, carbon fiber-reinforced materials, and even food materials (e.g., chocolate, dough) for special applications.
2.2 How to choose the right 3D printing material?
Material selection should be based on multiple factors: ① Application Scenario: Prototyping can use low-cost PLA; functional parts require ABS or nylon for strength; medical implants need biocompatible materials (e.g., titanium alloy, medical resin); ② Printing Technology: PLA/ABS for FDM, photosensitive resin for SLA, nylon powder for SLS, metal powder for SLM; ③ Performance Requirements: Consider mechanical properties (strength, toughness, wear resistance), appearance (translucency, surface finish), and environmental resistance (high temperature, corrosion); ④ Cost Budget: PLA is the cheapest, while metal materials and high-performance plastics (PEEK) are more expensive; ⑤ Post-Processing Needs: Materials that are easy to sand, paint, or polish (e.g., PLA, resin) are preferred if post-processing is required.
2.3 What are the limitations of 3D printing materials?
Common limitations include: ① Material Variety: Compared with traditional manufacturing, the types of 3D printing materials (especially high-performance materials) are relatively limited; ② Performance Gaps: Some 3D printed parts have lower density and mechanical properties than forged or cast parts (e.g., FDM parts have layer adhesion issues); ③ Size Restrictions: Most desktop 3D printers have small build volumes, limiting the size of printed parts; ④ Cost: Special materials (e.g., metal powder, PEEK) and professional-grade materials are expensive; ⑤ Compatibility: Not all materials are compatible with all printers—e.g., FDM printers cannot use liquid resin, and SLA printers cannot use filaments.
3. Precision and Parameter Setting
3.1 What factors affect the precision of 3D printed parts?
Key influencing factors: ① Printer Precision: Spindle runout, nozzle accuracy, and guideway stability of FDM printers; laser focus and resin curing uniformity of SLA printers; ② Layer Height: Thinner layer height improves surface precision and detail resolution but increases printing time; thicker layer height reduces precision but speeds up printing; ③ Material Properties: Material shrinkage (e.g., ABS shrinks easily, leading to dimensional deviation), warpage, and flowability; ④ Slice Parameters: Infill density, print speed, and temperature settings affect part dimensional stability; ⑤ Model Design: Overhangs without supports, uneven wall thickness, and complex details may reduce precision; ⑥ Post-Processing: Sanding, polishing, or curing may alter part dimensions if not operated properly.
3.2 How to set core parameters such as layer height, print speed, and infill density?
Parameter setting principles vary by needs: ① Layer Height: For high-precision parts, set 0.05-0.1mm; for rough prototypes, 0.2-0.3mm; ② Print Speed: FDM printers generally use 50-100mm/s—higher speed reduces time but may cause layer misalignment; SLA printers have fixed curing speeds, adjusted by laser power; ③ Infill Density: 0-100% adjustable—0% for hollow parts, 20-50% for general prototypes, 80-100% for high-strength functional parts (higher density increases weight and printing time); ④ Temperature: FDM nozzle temperature (PLA: 190-210℃, ABS: 230-250℃), heated bed temperature (PLA: 40-60℃, ABS: 80-100℃) to prevent warpage; SLA curing temperature controlled by UV light intensity; ⑤ Supports: Add supports for overhangs (angle <45° for FDM) to avoid collapse, but minimize supports to reduce post-processing.
3.3 What is slicing software, and why is it important?
Slicing software is a tool that converts a 3D model (STL/OBJ format) into a set of instructions (G-code) that the 3D printer can recognize. Its core functions include: dividing the model into layers, generating printing paths, setting parameters (layer height, speed, infill), adding supports, and simulating the printing process. Common slicing software includes Cura, PrusaSlicer, Simplify3D, and Chitubox (for SLA). Slicing software directly affects printing precision, speed, part strength, and success rate—poor slicing settings (e.g., incorrect support placement, uneven layer division) may lead to printing failures or defective parts.
4. Fault and Troubleshooting
4.1 Why do FDM printed parts warp or curl at the edges?
Causes: ① Temperature Difference: The bottom layer cools too quickly while the upper layers are hot, causing shrinkage and warpage (common in ABS); ② Insufficient Adhesion: The heated bed temperature is too low, or the bed surface is dirty, leading to poor adhesion between the part and the bed; ③ Material Moisture: Moisture in the filament evaporates during printing, creating internal stress and warpage. Solutions: ① Heat the bed to the appropriate temperature (ABS: 80-100℃, PLA: 40-60℃) and use a heated chamber for ABS; ② Clean the bed surface (wipe with isopropyl alcohol) or apply adhesion aids (glue stick, hairspray, PEI sheet); ③ Dry the filament (PLA: 40-60℃ for 2-4 hours, ABS: 80-90℃ for 4-6 hours) before printing; ④ Extend the initial layer printing time to improve adhesion.
4.2 How to solve nozzle clogging in FDM 3D printing?
Causes: ① Moisture in Filament: Evaporated moisture forms bubbles, causing material accumulation in the nozzle; ② Impurities in Filament: Dirt or foreign objects block the nozzle; ③ Temperature Too Low: Material does not melt completely, leading to clogging; ④ Long-Term Idling: Residual material in the nozzle solidifies when the printer is idle. Solutions: ① Increase nozzle temperature by 10-20℃ to melt the blocked material, then manually push the filament to clear the clog; ② Use a needle to unclog the nozzle (turn off the heater first to avoid burns); ③ Disassemble the nozzle for thorough cleaning (soak in acetone for PLA/ABS); ④ Replace the nozzle if it is severely worn or corroded; ⑤ Use high-quality, dry filament to prevent future clogs.
4.3 Why do SLA printed parts have rough surfaces or resin residues?
Causes: ① Insufficient Curing: The UV light intensity is too low, or the exposure time is too short, leaving uncured resin; ② Layer Height Too Large: Thick layers lead to obvious layer lines; ③ Resin Contamination: Dust or impurities in the resin affect surface quality; ④ Post-Processing Neglect: Failure to clean and cure parts properly after printing. Solutions: ① Adjust UV exposure time and intensity (follow the resin manufacturer’s recommendations); ② Reduce layer height (0.05-0.1mm) for smoother surfaces; ③ Filter the resin to remove impurities and replace old resin regularly; ④ Clean parts with isopropyl alcohol (IPA) to remove uncured resin, then cure them in a UV curing box for 10-30 minutes; ⑤ Polish the surface with sandpaper if necessary.
4.4 What causes layer misalignment in 3D printing?
Causes: ① Printer Vibration: The printer is placed on an unstable surface, causing positional deviation; ② Loose Mechanical Parts: Belt tension is insufficient, or screws of the guideway/motor are loose; ③ Print Speed Too High: The motor cannot keep up with the speed, leading to layer shifting; ④ Overheating: Motor overheating affects performance, causing positioning errors. Solutions: ① Place the printer on a stable, vibration-free surface (use anti-vibration pads if needed); ② Tighten belts and screws regularly to ensure mechanical stability; ③ Reduce print speed (especially for tall or complex parts); ④ Improve printer ventilation to prevent motor overheating; ⑤ Calibrate the printer’s axis and steps to ensure positional accuracy.
5. Cost and Efficiency Optimization
5.1 What factors affect the cost of 3D printing?
Main cost factors: ① Material Cost: The price of filaments, resins, or metal powders (e.g., metal powder is 10-20 times more expensive than PLA filament); ② Equipment Cost: Desktop FDM printers cost hundreds to thousands of dollars, while professional SLM metal printers cost hundreds of thousands; ③ Printing Time: Longer printing time increases electricity costs and labor costs; ④ Post-Processing Cost: Cleaning, curing, sanding, painting, or assembly requires additional materials and labor; ⑤ Waste Loss: Failed prints, support structures, and material waste (e.g., resin residue) increase costs.
5.2 How to reduce 3D printing costs?
Cost-saving strategies: ① Choose Cost-Effective Materials: Use PLA for prototypes instead of expensive resins or metals; ② Optimize Print Parameters: Increase layer height and print speed (within acceptable precision) to shorten time; adjust infill density to the minimum required strength; ③ Minimize Supports: Design models with self-supporting structures (overhang angle >45° for FDM) to reduce support material waste; ④ Batch Printing: Print multiple small parts in one cycle to maximize the use of the build volume and reduce setup time; ⑤ Reuse Materials: Recycle leftover filament or resin (if compatible) and reuse support structures for simple prototypes; ⑥ Prevent Failures: Calibrate the printer regularly, use dry materials, and simulate prints to avoid defective parts.
5.3 How to improve 3D printing efficiency without compromising quality?
Efficiency optimization methods: ① Parameter Balancing: Adjust layer height and speed (e.g., 0.15mm layer height + 80mm/s speed for FDM) to balance precision and speed; ② Infill Optimization: Use grid infill (faster to print) instead of honeycomb infill, and set infill density based on strength needs; ③ Model Design: Simplify complex details that are not necessary, avoid excessive overhangs, and split large parts into smaller, printable components for parallel printing; ④ Hardware Upgrade: Install a larger nozzle (0.4mm to 0.6mm for FDM) to increase material flow rate; use a dual-extruder printer for multi-material printing without setup changes; ⑤ Automation: Use printers with auto-bed leveling, filament runout detection, and remote monitoring to reduce manual intervention; ⑥ Post-Processing Integration: Choose materials that require minimal post-processing (e.g., resin for smooth surfaces) to save time.
6. Safety and Operation Specifications
6.1 What are the core safety precautions for 3D printing?
Key safety notes: ① High-Temperature Protection: FDM nozzles (190-250℃) and heated beds can cause burns—do not touch during printing; keep flammable materials away from the printer; ② Chemical Safety: SLA resins are toxic and irritating to the skin/eyes—wear gloves, goggles, and work in a well-ventilated area; clean resin spills with IPA and dispose of waste resin properly (do not pour down the drain); ③ Dust Control: SLS/SLM metal printing generates fine powder, which is harmful if inhaled—use a closed system and wear a dust mask; ④ Electrical Safety: Ensure the printer is grounded, avoid overloading circuits, and turn off the power when not in use or during maintenance; ⑤ Fire Prevention: Use fire-retardant materials (e.g., PLA is less flammable than ABS) and install a smoke detector near the printer.
6.2 How to maintain a 3D printer daily to extend its service life?
Daily maintenance measures: ① Cleaning: For FDM printers, clean the nozzle, heated bed, and extruder regularly to remove residual material; for SLA printers, clean the resin tank and build plate to avoid resin buildup; ② Lubrication: Apply lubricating oil to the guideways and screws of FDM printers to reduce friction and wear; ③ Calibration: Regularly calibrate the bed level, axis steps, and extruder flow rate to ensure printing precision; ④ Material Storage: Store filaments in a dry, sealed container (use desiccant packs) to prevent moisture absorption; store resins in a cool, dark place to avoid premature curing; ⑤ Component Inspection: Check belts, cables, and motors for wear or looseness—replace worn parts (e.g., nozzles, belts) in a timely manner; ⑥ Software Update: Keep the printer firmware and slicing software updated to fix bugs and improve performance.
Hot Articles

Hot Tags
Stay Connected!


Manufacturing on Demand
Please fill in the following information to obtain plan details (information is confidential and not disclosed publicly), we will contact you within 24 hours, please keep your phone available!
Upload a 3D/2D model to see instant pricing, lead time, and DFM feedback.