I. Basic Cognition
1. What is the core difference between CNC turning and traditional conventional turning?
Answer: The core difference lies in automatic control and precision stability. Traditional conventional turning relies on operators to manually control the lathe's feed, speed, and tool path, which has extremely high requirements for manual skills, and the precision is easily affected by human factors. It is suitable for small-batch and simple part processing. CNC turning uses compiled NC programs to control the linkage of spindle, turret and other components through the CNC system, realizing automatic and high-precision processing. It can stably ensure the dimensional tolerance and geometric accuracy of complex structural parts, and is suitable for mass production of high-precision parts. Meanwhile, the processing efficiency is 30%-80% higher than that of conventional turning.
2. What types of parts are mainly suitable for CNC turning?
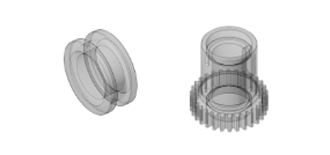
Answer: CNC turning mainly processes rotating parts, with core application scenarios including: shaft parts (such as motor shafts, hydraulic valve cores), sleeve parts (such as bearing sleeves, bushings), disk parts (such as flanges, gear blanks), and special-shaped rotating parts (such as complex parts with steps, grooves, and arcs). The machinable materials cover metals (steel, aluminum, copper, superalloys), engineering plastics, composite materials, etc. It is especially suitable for mass processing of rotating parts with high precision requirements (tolerance above ±0.005mm) and complex structures.
3. What are the core components of a CNC lathe?
Answer: The core components include five modules: ① Spindle system: Drives the workpiece to rotate, determines the processing speed and stability, and affects the roundness and coaxiality of parts. ② Turret/tool rest: Loads cutting tools to realize automatic tool change; the number of turret stations (usually 8-12) determines the types of tools that can be carried simultaneously. ③ CNC system (such as Siemens, Fanuc): The core control unit, responsible for parsing programs and driving the linkage of various components, which is crucial to ensuring processing precision. ④ Feed system: Composed of servo motors and ball screws, controls the tool movement along X and Z axes, and determines the feed precision. ⑤ Auxiliary system: Including cooling system (removes cutting heat), lubrication system (reduces component wear), and fixture system (fixes workpieces).
II. Practical Application
4. How to select reasonable cutting parameters (speed, feed rate, depth of cut) in CNC turning programming?
Answer: It needs to be comprehensively determined based on material, tool, and part precision, with the following core principles: ① Speed (S): Calculated according to tool material and workpiece diameter, the formula is S=1000×cutting speed (Vc)/(π×workpiece diameter d). For cemented carbide tools, Vc is 150-300m/min when cutting steel parts, and 300-600m/min when cutting aluminum parts. ② Feed rate (F): 0.15-0.3mm/r for rough machining (pursuing efficiency), 0.05-0.12mm/r for finish machining (ensuring surface quality); take smaller values for hard materials and larger values for soft materials. ③ Depth of cut (Ap): 0.2-0.5mm for rough machining (quickly removing allowance), 0.05-0.1mm for finish machining (avoiding workpiece deformation); the depth of cut for thin-walled parts needs to be further reduced (≤0.1mm). In actual production, parameters should be optimized through trial cutting to avoid excessive tool wear or workpiece deformation.
5. What are the common tool types in CNC turning, and how to select them?
Answer: Common tools are divided into three categories by purpose: ① External turning tools: Process the outer circle, steps, and end faces of workpieces. Classified by tool tip angle (90°, 75°, 45°), 90° tools are suitable for shaft parts with good rigidity, and 45° tools are suitable for simultaneous processing of end faces and outer circles. ② Internal turning tools: Process inner holes and inner steps of workpieces, need to match the inner hole diameter (to avoid interference); shock-resistant internal turning tools should be selected for deep holes with large length-diameter ratios. ③ Form tools: Process special features such as annular grooves, threads, and arcs (e.g., thread tools, grooving tools), which can realize one-time forming to improve efficiency. Core selection principles: Cemented carbide tools are suitable for high-speed cutting of hard materials such as steel and superalloys; PCD diamond tools are suitable for soft materials such as aluminum and copper (to avoid tool adhesion); coated tools (AlCrN, TiN) can extend tool life and adapt to high-precision processing.
6. How to avoid workpiece clamping deformation in CNC turning?
Answer: The core is to reduce clamping stress and cutting stress, with common methods: ① Optimize clamping method: Use soft jaw fixtures, hydraulic expansion sleeve fixtures for thin-walled parts, or add auxiliary supports (such as steady rests, follow rests) to avoid excessive single-point clamping force. ② Control clamping force: Adjust pressure for hydraulic fixtures (usually 50-100N); use cross-symmetrical clamping for manual chucks to ensure uniform force. ③ Optimize processing technology: First perform rough machining to remove most allowance (release internal stress), then semi-finish and finish machining; perform aging treatment or cryogenic treatment after rough machining to eliminate stress before finish machining. ④ Reduce cutting force: Adopt high-speed and low-feed cutting parameters with small depth of cut, and use sharp tools to reduce cutting resistance.
III. Process Optimization and Quality Control
7. What are the common reasons for unqualified dimensional accuracy of CNC turned parts and their solutions?
Answer: Common reasons and countermeasures: ① Tool wear/damage: Replace tools, optimize cutting parameters to extend tool life, and install on-line probes for real-time compensation of tool wear. ② Clamping error: Re-calibrate fixtures, check if the positioning datum is clean and flat, and complete multi-process processing with one-time clamping to avoid cumulative errors from multiple clampings. ③ Machine tool precision drift: Regularly calibrate the precision of machine tool spindle and feed axes, and check and adjust ball screw clearance. ④ Program error: Verify coordinate values and tool nose radius compensation parameters in the program, and correct programming errors. ⑤ Thermal deformation impact: Extend machine tool warm-up time, optimize the cooling system (e.g., high-pressure cooling), and avoid workpiece or machine tool deformation caused by cutting heat.
8. How to improve the surface quality of CNC turned parts (reduce scratches and lower roughness)?
Answer: The key lies in three aspects: tools, parameters, and processes. ① Tool optimization: Select sharp PCD or coated tools, ensure the tool tip arc is smooth and free of chipping, and regrind tools regularly. ② Parameter adjustment: Adopt high-speed and low-feed for finish machining (speed ≥5000r/min, feed rate ≤0.1mm/r), and use constant cutting speed mode to avoid uneven surface caused by speed fluctuation. ③ Process improvement: Remove burrs and oxide scales before finish machining to avoid scratching the machined surface; adopt Minimum Quantity Lubrication (MQL) technology to reduce cutting fluid residue and tool adhesion; control cutting temperature when processing thin-walled parts to avoid surface ripples caused by thermal deformation.
9. How to solve common thread processing faults (such as thread misalignment, inaccurate pitch) in CNC turning?
Answer: ① Thread misalignment: The core reason is the synchronization deviation between the spindle and feed axis. Solutions: Ensure the thread lead parameter in the program is correct, check if the spindle encoder signal is normal, perform trial cutting on the first workpiece to confirm consistent thread starting position, and avoid mid-processing shutdown. ② Inaccurate pitch: Check the precision of machine tool ball screws (for wear), calibrate the positioning precision of feed axes, optimize thread cutting parameters (reduce feed speed, increase cutting times), adopt layered cutting to reduce thread deformation, and ensure the tool tip angle matches the thread profile (e.g., 60° tool tip for triangular threads).
IV. Equipment Maintenance and Safety
10. What are the core points of daily maintenance for CNC lathes?
Answer: Daily maintenance shall be carried out in grades: daily, weekly, and monthly. ① Daily: Clean machine tool guideways, spindle end faces, and turrets; check the level and cleanliness of cutting fluid (replace emulsion in a timely manner); lubricate all moving components (add lubricating oil); check fixture precision and wear. ② Weekly: Check the lubrication and cleanliness of ball screws and guideways; fasten connecting bolts of all components; calibrate tool compensation parameters. ③ Monthly: Check spindle speed precision and servo motor operation status; clean the cooling system filter; detect machine tool levelness and perform precision calibration if necessary. Regular maintenance can extend machine tool service life and avoid sudden faults affecting production.
11. What safety precautions should be noted during CNC turning operations?
Answer: Core safety points: ① Before starting the machine, check the machine tool status to confirm the cooling, lubrication, and fixture systems are normal; wear protective equipment (cut-resistant gloves, goggles; loose clothing is prohibited). ② Adopt single-block operation, low speed, and manual feed during program debugging; observe for tool-workpiece interference to avoid collisions (collisions may damage tools and spindles). ③ During processing, do not touch rotating workpieces, tools, or moving components with hands; do not open the protective door. ④ Ensure the workpiece is firmly clamped to prevent flying out during high-speed rotation; reasonably control the speed for thin-walled parts to avoid deformation or flying out due to centrifugal force. ⑤ After shutdown, clean the machine tool, turn off the power and cutting fluid pump, organize tools and workpieces, and keep the operation area tidy.
V. Advanced Questions
12. What are the advantages and applicable scenarios of double-spindle CNC lathes compared with ordinary single-spindle CNC lathes?
Answer: The advantages lie in high efficiency and precision: ① Double spindles perform synchronous processing, which can complete the turning of both ends of the workpiece simultaneously without secondary clamping, greatly shortening the processing cycle (efficiency increased by 40%-60%). ② Complete the processing of both ends with one-time clamping, avoiding coaxiality errors caused by secondary clamping and improving the geometric accuracy of parts. ③ Reduce process flow and manual intervention, suitable for mass production. Applicable scenarios: Mass-produced shaft and sleeve parts (such as hydraulic valve cores, motor shafts), especially showing significant advantages in processing parts with symmetrical structures at both ends and high coaxiality requirements (≤8μm).
13. What is the difference between CNC turning and turn-mill compound processing, and how to choose?
Answer: The core difference lies in processing capabilities: CNC turning can only realize turning operations (outer circle, inner hole, thread, groove), suitable for pure rotating parts. Turn-mill compound processing integrates turning, milling, drilling and other functions, and can process complex rotating parts with planes, keyways, and eccentric structures (such as crankshafts, camshafts). It can complete multi-process processing without changing equipment, with higher precision and efficiency but higher equipment cost. Selection principles: For pure rotating parts with large batches and general precision requirements, choose CNC turning (low cost, stable efficiency); for complex structural parts (requiring turn-mill compound processes) and extremely high precision requirements (tolerance within ±0.003mm), choose turn-mill compound processing (reducing process errors).
Hot Articles
Hot Tags
Manufacturing on Demand
Please fill in the following information to obtain plan details (information is confidential and not disclosed publicly), we will contact you within 24 hours, please keep your phone available!

Upload a 3D/2D model to see instant pricing, lead time, and DFM feedback.


