



Pad Printing vs Screen Printing: What Changes the Result?


You have the artwork and the part is already designed, but which printing process should you use? Pad printing and screen printing can both produce clear, durable markings, yet the better choice can change with the part geometry, print area, surface condition, and production requirements.
For industrial parts, pad printing is commonly used for small markings on curved, recessed, textured, or irregular surfaces. Screen printing is generally better suited to larger graphics on flat or accessible surfaces. The choice becomes less obvious when a part combines curves, tight features, multiple colors, or demanding durability requirements.
The practical questions are simple: Can the process reach the print area consistently? Will the ink adhere to the finished surface? And will the marking survive the product's actual service conditions?
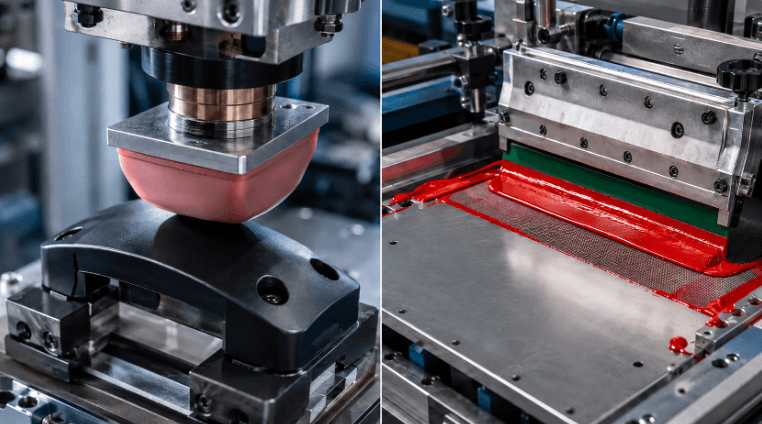
Pad Printing vs Screen Printing at a Glance
Pad printing transfers ink through a flexible silicone pad, while screen printing deposits ink through a mesh stencil. That difference affects the types of surfaces, graphic sizes, and part geometries each process handles efficiently.
| Factor | Pad Printing | Screen Printing |
|---|---|---|
| Typical application | Small, localized markings | Larger graphics and broad coverage |
| Surface | Curved, recessed, textured, irregular | Flat, open, accessible, some gentle curves |
| Typical graphics | Icons, text, scales, part numbers, small logos | Logos, panels, labels, large graphics |
| Ink transfer | Cliché → silicone pad → part | Mesh screen → part |
| Large print areas | Less efficient in many applications | Often more efficient |
| Complex 3D geometry | Strong advantage | More limited |
| Multiple colors | Possible; registration required | Possible; separate screens and registration required |
| Variable data | Limited advantage | Limited advantage |
| Permanent variable marking | Consider laser marking | Consider laser marking |
For a small image on a difficult 3D surface, pad printing is usually the first process to evaluate. For broad graphics on an accessible surface, screen printing is often the more practical starting point.
How Pad Printing and Screen Printing Transfer Ink
The two processes differ at the point where the ink meets the part. Pad printing uses a flexible intermediate surface; screen printing brings the ink through a stencil directly onto the substrate.
Pad printing
In pad printing, the artwork is etched into a printing plate, or cliché. Ink fills the recessed image, excess ink is removed, and a silicone pad picks up the remaining ink. The pad then compresses against the part and releases the image.
Because the pad can deform, it can reach localized areas that would be difficult to print with a rigid surface. This makes the process useful for buttons, knobs, small housings, controls, scales, symbols, and part numbers.
There are practical limits. Deep recesses, tight clearances, awkward orientations, and artwork close to vertical walls can make pad selection and fixturing more difficult. Multi-color graphics also require controlled registration between passes.
Screen printing
Screen printing uses a mesh screen with a stencil that defines the artwork. A squeegee moves across the screen and forces ink through the open areas onto the substrate.
The process works particularly well when the printed area is broad and accessible. Equipment panels, electronics enclosures, appliance-style housings, labels, and large graphics are common applications.
Screen printing can also work on some cylindrical or gently curved parts. The screen, fixture, and printing motion have to maintain suitable contact and registration throughout the stroke.
Advantages and Limitations: Pad Printing vs Screen Printing
Pad printing provides more freedom around localized three-dimensional features. Screen printing generally makes better use of a large, accessible surface.
| Process | Advantages | Limitations |
|---|---|---|
| Pad printing | Curved and recessed surfaces; small localized markings; irregular parts | Less efficient for very large graphics; cliché and setup required; registration matters for multi-color work |
| Screen printing | Large graphics; broad coverage; accessible surfaces | Complex geometry can restrict screen access; curved applications require suitable contact and fixturing |
The right comparison depends on the actual part. A recessed button, a control-panel graphic, and a large equipment enclosure place very different demands on the printing process.
Part Geometry and Print Access
Geometry affects whether the equipment can reach the intended surface and place the image consistently. Pad printing is particularly useful when the print area is localized and three-dimensional. Screen printing needs sufficient access for the screen and squeegee.
| Part condition | Process to consider | Engineering question |
|---|---|---|
| Small curved button | Pad printing | Can the pad reach the artwork without distorting it? |
| Recessed logo | Pad printing | Is there enough clearance for the pad and fixture? |
| Small mark near a vertical wall | Pad printing | Can the marking be positioned consistently? |
| Large flat control panel | Screen printing | Can the screen cover the area with stable registration? |
| Large enclosure graphic | Screen printing | Can the part remain fixed throughout the print stroke? |
| Cylindrical or gently curved surface | Either | Can the selected process maintain contact and registration? |
| Irregular 3D housing | Often pad printing | Can the pad reach the area without interfering with surrounding features? |
A drawing review should look at radius, feature depth, nearby ribs or walls, print location, part orientation, and fixture access. “Curved” and “flat” are useful descriptions, but they do not tell the whole story.
Fixturing becomes especially important when the marking has a tight positional requirement. A manually aligned prototype may look acceptable while production parts need the same image to land in the same location from one cycle to the next.
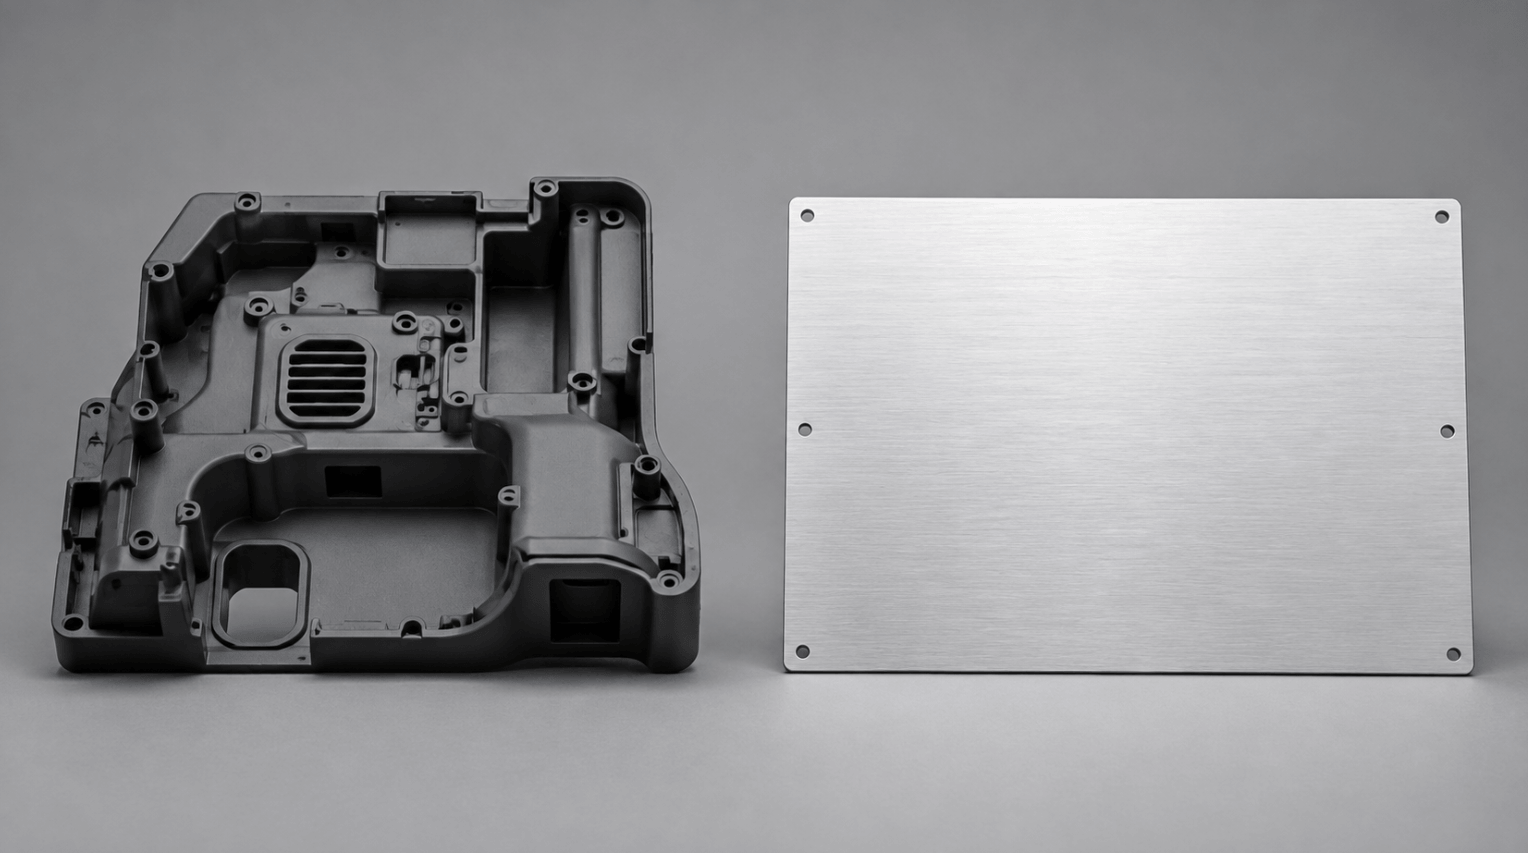
Artwork Size, Detail, and Color Count
Graphic size is one of the clearest practical differences between the two processes. Pad printing works well for localized text, icons, scales, symbols, and small logos. Screen printing becomes increasingly attractive as the graphic covers more of an accessible surface.
Fine detail should be evaluated from the complete printing setup rather than assigned automatically to one process. Cliché or screen characteristics, ink, substrate, artwork, and access to the print area all affect the final result.
Both processes can produce multi-color graphics. Each additional color adds another printing step or setup and increases the importance of registration. For a small multi-color marking, pad printing can be practical; for a large multi-color graphic, screen printing may provide a more efficient setup.
Material and Surface Preparation
Material compatibility is only the starting point. The finished surface, texture, coating, surface energy, preparation, ink chemistry, and curing all affect adhesion.
Industrial printing may be applied to materials such as:
- ABS
- PC and PC/ABS
- PP and PE
- Nylon and POM
- TPU/TPE
- Aluminum
- Stainless steel
- Glass
- Acrylic
- Painted or coated metals
PP and PE deserve particular attention because their low surface energy can make adhesion more difficult. Depending on the application, a suitable ink system or surface treatment such as flame, corona, or plasma treatment may be required.
The same base material can behave differently after molding, polishing, anodizing, powder coating, painting, or texturing. The relevant specification is therefore the finished production surface, rather than simply “ABS” or “aluminum” on the material list.
When adhesion matters, validation should use representative production material and surface conditions. Cross-cut or cross-hatch adhesion testing, rub testing, chemical resistance testing, or other application-specific methods can be used where appropriate.
Durability Depends on the Application
Marking life depends on the ink system, substrate, surface preparation, curing, coating, and service environment. The printing process is only one part of the durability equation.
Before specifying the marking, define what it will encounter:
- Frequent handling and abrasion
- Oils, solvents, or industrial chemicals
- UV and outdoor exposure
- Alcohol or disinfectant wiping
- Temperature cycling
- Moisture
- Skin oils and sweat
- Sterilization or dishwasher exposure where applicable
A fresh sample can look excellent and still fail during service. Adhesion, rub resistance, chemical resistance, and other performance tests should be selected according to the actual use environment.
A Mastars case: printed markings on a medical simulation housing
The ScanTrainer medical simulation housing is a useful example because the printed marking was evaluated as part of the complete component. The project used silk-screened markings that needed to remain stable during alcohol wiping while the housing also met dimensional, cosmetic, and assembly requirements.
Mastars documented ±0.02 mm control in critical areas, 98% first-sample acceptance on critical mounting features, and a reduction in sample lead time from 18 days to 8 days.
See the full Mastars ScanTrainer medical prototype case
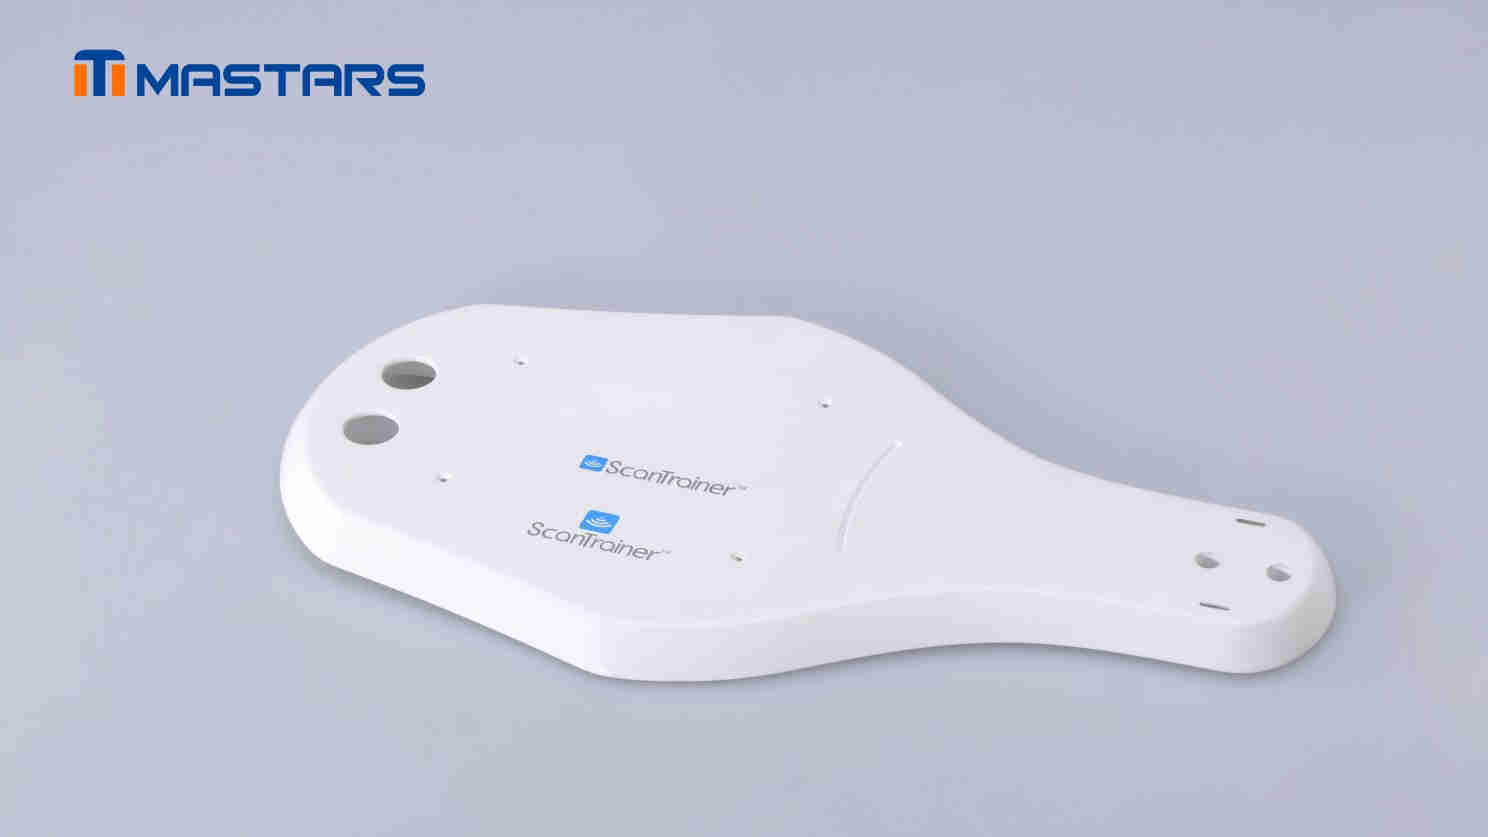
The print had to work with the material, surface, placement, dimensional requirements, and intended handling conditions. That is the level at which a printing process should be validated for a production component.
Comparing Printing Cost
Pad printing is not automatically cheaper than screen printing. Small localized graphics can make pad printing economical, while screen printing can be more efficient for large graphics. Setup, print area, colors, quantity, fixtures, cycle time, inspection, and rework all affect the final cost.
| Cost factor | Pad Printing | Screen Printing |
|---|---|---|
| Initial setup | Cliché, pad, ink, fixture | Screen, stencil, ink, fixture |
| Multiple colors | Additional setup or passes | Additional screens/setup |
| Small localized graphic | Often efficient | Setup can be significant relative to print area |
| Large graphic | Less efficient in some applications | Often efficient |
| Low volume | Setup has greater unit-cost impact | Setup has greater unit-cost impact |
| High volume | Setup can be spread across more parts | Setup can be spread across more parts |
| Artwork revisions | New cliché/setup may be required | New screen/setup may be required |
For low-volume work, fixed setup costs can have a noticeable effect on unit price. At higher volumes, cycle time, yield, registration, and repeatability become more important.
Frequent artwork changes should also be considered. If every part needs a unique serial number or QR code, laser marking may avoid repeated screen or cliché changes.
For procurement, compare the total process cost, including setup, fixtures, preparation, curing, inspection, yield, and potential rework.
When Laser Marking Makes More Sense
Laser marking becomes worth evaluating when the requirement involves permanent identification, variable data, or a marking that should not rely on a conventional ink layer.
| Requirement | Process to consider |
|---|---|
| Small curved logo | Pad printing |
| Large graphic on a flat panel | Screen printing |
| Variable serial number | Laser marking |
| Variable QR code | Laser marking |
| Small marking on an irregular housing | Pad printing |
| Large opaque graphic | Screen printing |
| Abrasion-critical identification | Laser marking or validated ink system |
Laser marking is particularly useful when every part carries different information. Serial numbers, traceability codes, and QR codes can change from part to part without creating a new screen or cliché for each mark.
The trade-off is material response. Contrast, marking depth, heat sensitivity, surface appearance, and the required permanence all need to be checked before selecting a laser process.
A product can also use multiple marking methods. Button icons may be pad printed, a large enclosure graphic screen printed, and serial numbers laser marked.
Five Questions Before Choosing a Process
A quick review of five points usually narrows the options considerably:
1. Where does the marking go?
Recesses, curves, nearby walls, and limited access can favor pad printing.
2. How large is the graphic?
Large open graphics generally make better use of screen printing.
3. What is the finished surface?
Material, texture, coating, and surface preparation affect adhesion.
4. What will the marking encounter?
Define cleaning agents, abrasion, chemicals, UV exposure, moisture, and temperature before selecting the ink system.
5. How many parts and colors are required?
Setup, registration, cycle time, and tooling have different cost implications at prototype, low-volume, and production quantities.
These questions can be answered before sampling and will often expose the main manufacturing risks early.
What Should You Include in a Printing RFQ?
A manufacturer can make a more useful recommendation when the quotation request includes the part, artwork, quantity, and service requirements. You do not need a perfect production specification to start.
Part
- CAD model
- Material and grade
- Finished surface or coating
- Print location and dimensions
- Approximate quantity
- Required durability
Artwork
- Artwork file
- Final dimensions
- Number of colors
- Color standards such as Pantone, where applicable
- Registration or fine-detail requirements
Application
- Cleaning method
- Chemical exposure
- UV or outdoor exposure
- Temperature range
- Abrasion or frequent handling
- Serial numbers, QR codes, or other variable data
If some details are still uncertain, rough information is fine to start. A part model, artwork, material, approximate quantity, and description of how the marking will be used are usually enough to identify the main process questions.
The printed area should be treated as an engineered surface. Geometry affects transfer, the finished surface affects adhesion, fixturing affects registration, and curing affects final ink performance.
When Both Processes Are Technically Feasible
Some parts can reasonably be printed using either process. In those cases, compare the two against the requirement that matters most in production.
A shallow curved housing, for example, may accept screen printing or pad printing. A small graphic close to a recessed feature may be easier to transfer with a pad, while a large graphic across an open surface may favor screen printing.
Prototype testing can settle the question when both processes appear feasible. It can reveal problems with adhesion, registration, appearance, fixture access, or durability before the process is committed to production.
A good-looking prototype demonstrates feasibility. Production readiness still requires repeatability under the intended manufacturing and service conditions.
Pad Printing vs Screen Printing: The Practical Choice
Pad printing is usually the stronger starting point for small, localized markings on curved, recessed, textured, or irregular surfaces. Screen printing generally works better for larger graphics across flat or accessible areas.
From there, look at the finished surface, ink adhesion, artwork, durability requirements, fixturing, quantity, and total cost. Variable identification and highly wear-resistant markings may point toward laser marking instead.
In practice, process selection comes down to repeatable marking on the finished part, at the required volume and under the actual service conditions.
Need help choosing a printing process?
Send your CAD model, artwork, material specification, print location, expected quantity, and durability requirements. These details are enough to start comparing pad printing, screen printing, laser marking, or another suitable finishing method.
FAQs
Is pad printing better than screen printing?
It depends on the part. Pad printing is generally a better starting point for small markings on curved, recessed, textured, or irregular surfaces. Screen printing is usually more efficient for larger graphics on accessible surfaces. Material, artwork, durability, quantity, and setup can change the decision.
Is silk screening the same as screen printing?
Yes. Silk screening, silk screen printing, and screen printing commonly refer to the same basic process. Modern screens typically use synthetic mesh rather than silk, but “silk screening” remains a common industry term.
Can pad printing be used on curved surfaces?
Yes. The silicone pad can conform to convex, concave, recessed, and irregular surfaces. Radius, feature depth, artwork, pad selection, orientation, and fixturing determine how well a particular part can be printed.
Can screen printing be used on cylindrical parts?
Yes, for suitable geometries. The screen needs enough access and consistent contact during the printing stroke. Diameter, curvature, fixture design, and artwork position all affect the result.
Is pad printing durable?
It can be. Durability depends on the substrate, surface preparation, ink system, curing, coating, and service environment. Abrasion, chemicals, cleaning agents, UV, and temperature exposure should be considered during ink selection and validation.
Which is better for plastic parts: pad printing or screen printing?
The material and geometry both matter. Pad printing is often useful for small or irregular plastic components, while screen printing can work well on larger accessible surfaces. PP and PE may require particular attention to ink selection or surface treatment because of their low surface energy.
Can pad printing print multiple colors?
Yes. Additional colors require additional printing steps or controlled setup, and registration becomes more important as color count increases. The graphic size and production quantity also affect which process is more practical.
How long does pad printing last?
Service life varies by application. A marking on a frequently handled control panel faces very different conditions from one inside a protected enclosure. Substrate, ink, curing, surface preparation, cleaning, abrasion, chemicals, UV, and temperature should all be considered when defining the expected life.
How expensive is pad printing?
Cost depends on the complete production setup. Cliché and fixture costs, artwork complexity, colors, print area, quantity, curing, inspection, and rework can all affect the unit price. For low-volume work, setup costs have a larger impact; at higher volumes, cycle time and repeatability become more important.
Hot Articles
Hot Tags
Stay Connected!


Manufacturing on Demand
Please fill in the following information to obtain plan details (information is confidential and not disclosed publicly), we will contact you within 24 hours, please keep your phone available!
Upload a 3D/2D model to see instant pricing, lead time, and DFM feedback.