



Vacuum Forming vs Injection Molding: Key Differences, Costs & Applications


Vacuum forming and injection molding can both produce plastic housings, covers, panels, and enclosures, but they fit different part requirements. Vacuum forming is often a practical choice for large, relatively simple thin-walled parts when tooling investment needs to stay low or the design is still changing. Injection molding is better suited to parts that depend on molded-in ribs, bosses, clips, snap fits, controlled interfaces, and repeatable production.
Large enclosures can still require injection molding when they include connector openings, PCB clearance features, mounting points, or other molded details. Vacuum forming can handle the overall shell, but trimming, machining, hardware, and assembly may add significant work afterward.
Tooling cost is only one part of the calculation. Wall-thickness distribution, dimensional variation, material behavior, inspection, secondary operations, and recurring part cost all affect the final process choice.
Vacuum Forming vs Injection Molding: Quick Comparison
Vacuum forming generally fits large shell-like parts with relatively simple geometry, while injection molding becomes more useful as integrated three-dimensional features and production repeatability become important.
| Factor | Vacuum Forming | Injection Molding |
|---|---|---|
| Initial tooling | Usually lower | Usually higher |
| Large surface area | Strong fit | Possible, but mold and press size become important |
| Thin-wall shells | Strong fit | Possible with suitable resin and mold design |
| Complex 3D features | More limited | Strong fit |
| Ribs and bosses | Often require secondary work | Can be molded directly |
| Snap fits / clips | Limited by forming geometry | Well suited when properly designed |
| Wall thickness | Changes with sheet stretching | Defined by cavity geometry, but still affected by cooling and shrinkage |
| Critical dimensions | Affected by forming and trimming | Generally more repeatable when tooling and process are stable |
| Design changes | Relatively easier before production tooling | Changes after tooling can be expensive |
| Lower-volume work | Often attractive | Can be justified when secondary operations are costly |
| Higher recurring volume | Depends on cycle and secondary work | Often more economical |
| Typical parts | Covers, panels, large housings, trays | Electronic housings, structural parts, feature-rich enclosures |
Production volume should be evaluated together with geometry, tooling, secondary operations, and recurring cost. A large part with many functional features may justify injection molding at a moderate volume, while a simpler shell can remain economical to thermoform at a higher quantity.
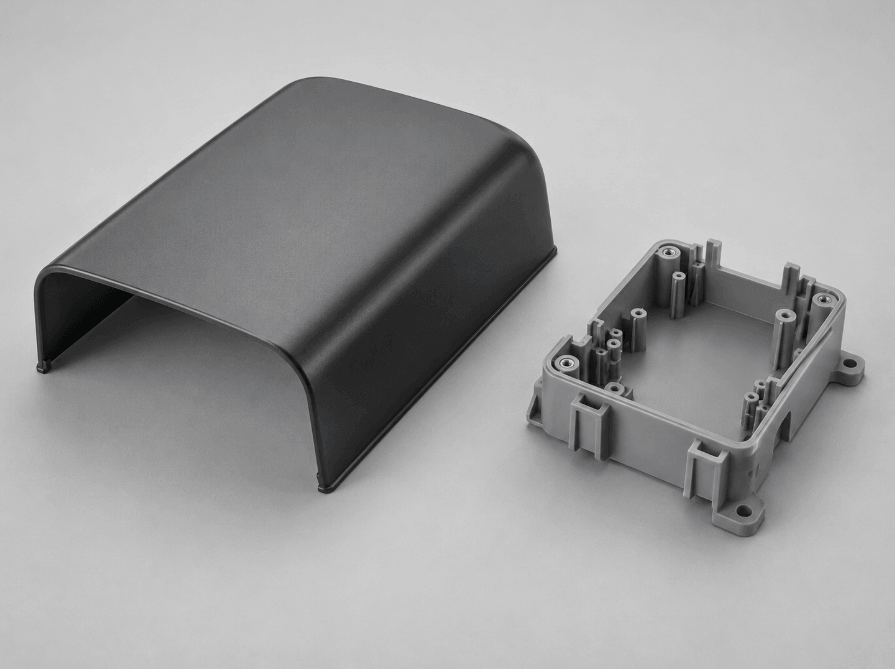
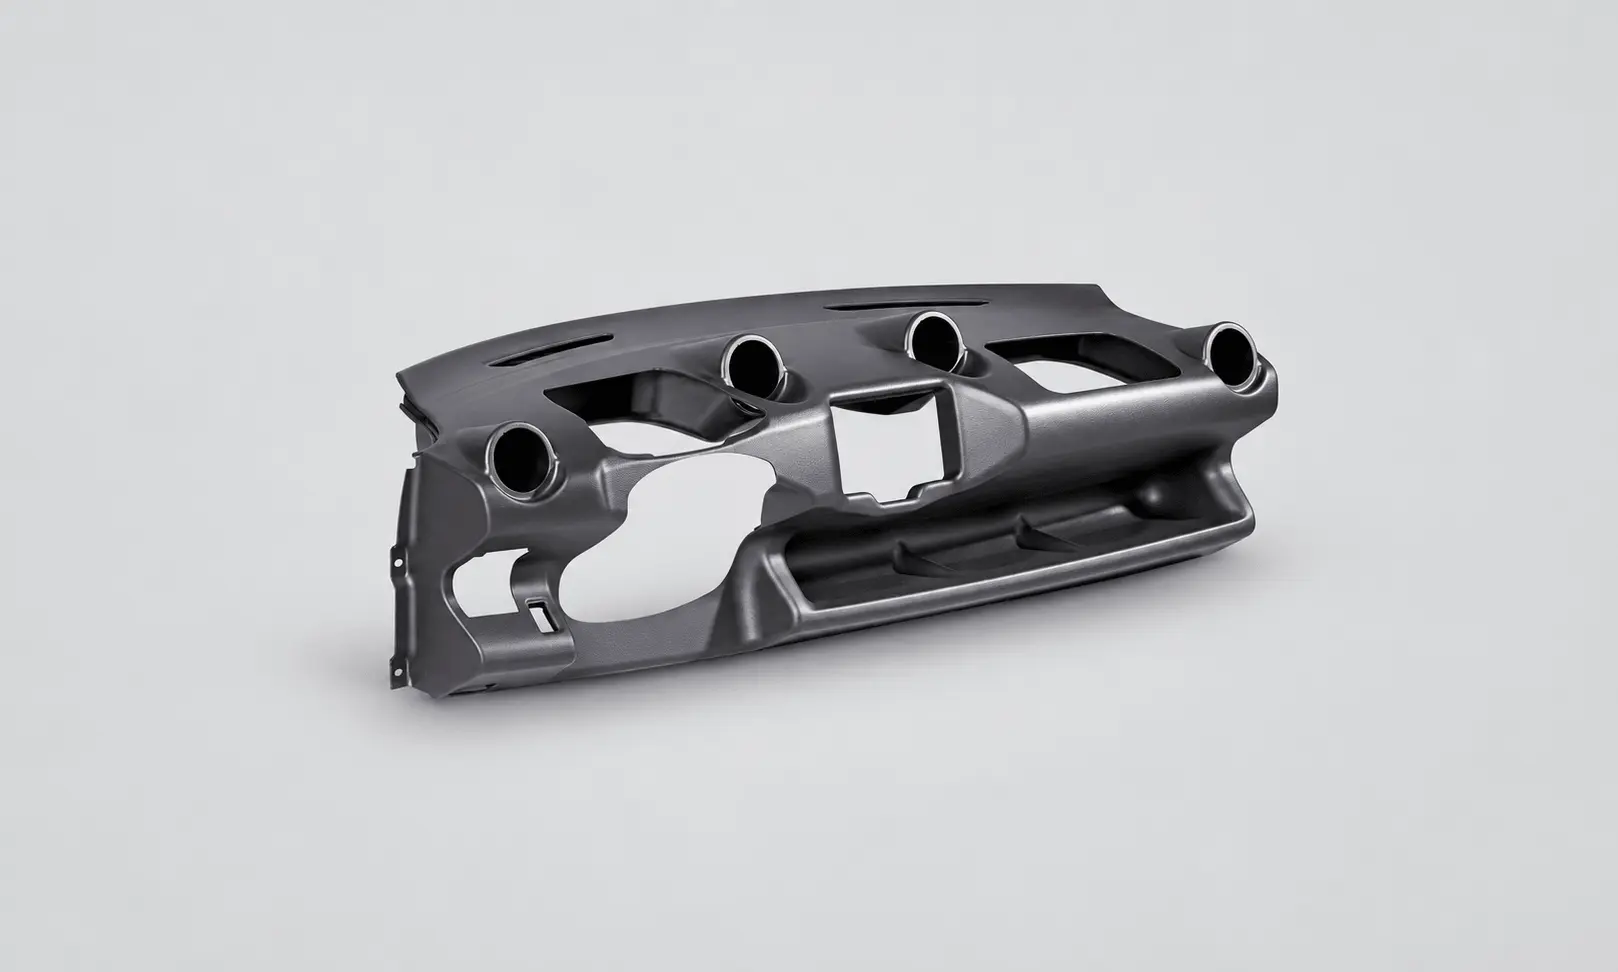
Vacuum forming and injection molding plastic parts comparison
What Is Vacuum Forming and When Does It Make Sense?
Vacuum forming heats a thermoplastic sheet and draws it against a mold using a pressure difference created by vacuum. Because the tool does not need to withstand injection pressure, the initial tooling can be relatively simple. The process is particularly useful for large shell-like parts where the main requirement is a formed surface rather than numerous molded-in features.
How Does Vacuum Forming Work?
The basic vacuum forming sequence is:
- Heat the plastic sheet into its forming range.
- Clamp and position the sheet over the mold.
- Evacuate air between the sheet and mold.
- Allow atmospheric pressure to pull the softened sheet against the mold surface.
- Cool the formed part.
- Demold and trim the finished shape.
The sheet stretches as it conforms to the mold, so the starting gauge does not directly equal the final wall thickness.
ScienceDirect’s Applied Plastics Engineering Handbook reference describes vacuum forming as a low-pressure sheet-forming process in which wall thickness depends on how different areas of the sheet stretch to reach the mold surface.
What Types of Parts Fit Vacuum Forming?
Large covers, equipment housings, trays, panels, and relatively open enclosures are common candidates for vacuum forming. It is particularly useful when the part needs a large formed surface and functional features can be handled through the forming process or subsequent machining and assembly.
Draw depth has a direct effect on sheet stretching and final wall thickness. ScienceDirect’s thermoforming reference notes that conventional female-mold vacuum forming can become thickness-limited at draw depths of roughly one-third to one-half of the maximum width, depending on forming conditions and geometry.
This is a process guideline rather than a universal design limit. Mold type, material, pre-stretching, plug assistance, and part geometry can change the result.
A shallow equipment cover may be straightforward. A deep enclosure with structural wall requirements needs a closer review of sheet distribution before the process is selected.
What Are the Main Vacuum Forming Limitations?
The main vacuum-forming limitation is material distribution. A flat sheet must stretch into a three-dimensional shape, and areas that travel farther can lose more thickness. ScienceDirect’s thermoforming references describe wall-thickness variation as a consequence of differential stretching.
For design review, pay particular attention to:
- Deep draws: Greater stretch can increase local thinning.
- Tight corners: Material may redistribute unevenly around sharp transitions.
- Webbing: Closely spaced walls or features can create unwanted folds.
- Trimming: Openings and edges commonly require CNC routing, drilling, or dedicated trimming.
- Secondary features: Bosses, threads, snap fits, and mounting details may require separate operations.
- Surface control: In conventional single-sided thermoforming, the mold-contacting surface receives direct tool definition while the opposite surface does not.
In Mastars’ multi-port USB charger project, prototype validation covered appearance, interface positioning, PCB accommodation, enclosure fit, and assembly relationships before the project moved into injection-molding DFM and tooling.
The final cost therefore depends on how much trimming, machining, hardware, and assembly the formed shell requires.
What Does Injection Molding Change?
Injection molding starts with thermoplastic resin rather than a sheet. Molten material fills a closed mold cavity, is packed and cooled, and is then ejected. The mold can define complex three-dimensional features directly, making the process useful when ribs, bosses, clips, locating features, or snap fits are part of the functional design.
How Does Injection Molding Work?
A typical injection-molding cycle consists of:
Melt → Fill → Pack → Cool → Eject
The mold determines much more than the outside shape. Gate position affects how material enters the cavity. Cooling-channel layout influences heat removal. Parting lines and draft affect release from the mold. Ejector locations influence both demolding force and visible marks.
Draft depends on wall depth, material, surface texture, shrinkage, ejection, and mold design. Textured surfaces generally require more draft than smooth vertical faces.
What Design Features Favor Injection Molding?
Injection molding becomes especially useful when several functional features need to be created in one repeatable operation.
Common examples include:
- Screw bosses
- Structural ribs
- Locating pins
- Snap fits
- Clips
- Mounting features
- Connector interfaces
- Controlled enclosure gaps
- Undercuts using appropriate tooling
- Mating surfaces
Wall thickness requires different design considerations in thermoforming and injection molding. In injection molding, large thickness changes can create uneven cooling, sink marks, voids, and warpage. Ribs and gussets are usually designed thinner than the main wall to provide stiffness without creating excessive material concentration.
For example, if a 2.5 mm nominal wall needs reinforcement, making the rib nearly as thick as the wall can create a heavy section that cools differently from the surrounding material.
Mastars’ PitPat GPS tracker project uses PC+ABS injection molding for a housing less than 60 mm long and weighing about 30 g. The housing includes a distinctive paw detail and requires controlled fit, appearance, and production consistency within a small package.
What Injection Molding Risks Should Be Considered?
Injection molding adds feature integration, but the filling and cooling stages introduce additional process risks. Polymer orientation during filling and uneven cooling can create residual stress. Depending on geometry and tooling, this can contribute to warpage, dimensional change, cracking, whitening, or assembly deformation.
Mastars’ engineering experience with injection-molding residual stress identifies polymer orientation during melt flow and temperature differences during cooling and shrinkage as two major sources. Gate location, runner design, cooling layout, product geometry, and ejection structure can further affect the result.
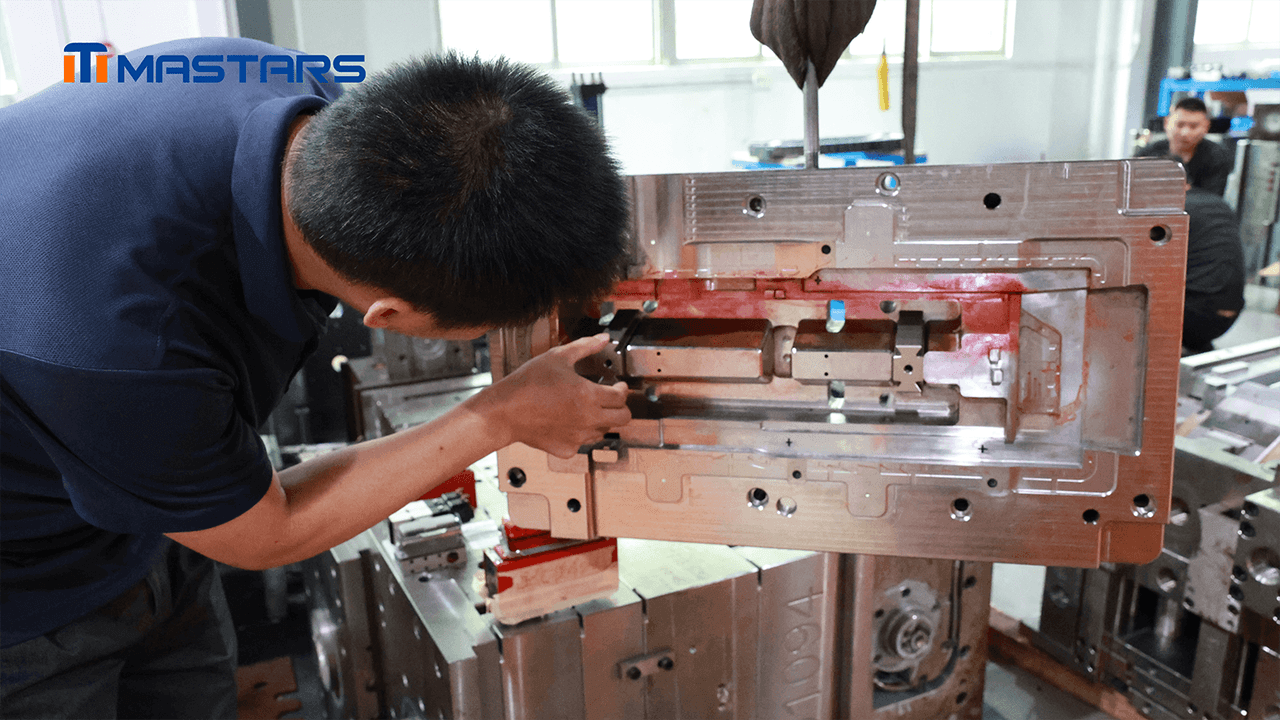
These factors should be reviewed before tooling. Mold-flow analysis can examine filling and pressure behavior, while trial molding helps confirm dimensions, appearance, filling behavior, and deformation trends.
Vacuum Forming vs Injection Molding: What Are the Real Differences?
The difference becomes clearer when individual part features are compared. Large surface area, draw depth, wall-thickness distribution, critical openings, molded-in features, and cosmetic requirements can all change the preferred process.
Which Has Lower Tooling Cost?
Vacuum forming usually has the lower initial tooling burden because the forming tool does not require the runner, gate, cooling, and ejection architecture of an injection mold. This is useful when the design is still changing or only a limited number of parts are needed initially.
Injection tooling becomes more involved when the design requires side-actions, complex cores, undercuts, controlled cooling, multiple cavities, or extensive surface requirements.
A $10,000 forming tool is not automatically cheaper overall than a $30,000 injection mold if every formed part requires substantial CNC trimming and assembly.
Which Is Better for Large Plastic Parts?
Vacuum forming is often a straightforward choice for a large, relatively simple shell. The sheet can cover a large surface without requiring a complete injection cavity around the entire volume.
Large parts with deep draws, structural ribs, internal mounting points, or tightly controlled interfaces need closer comparison. Pressure forming or plug-assisted thermoforming can improve feature definition or thickness distribution in suitable applications.
With plug assistance, the sheet is mechanically pre-stretched before vacuum is applied. ScienceDirect describes this approach as a way to redistribute stretching and improve wall-thickness distribution in suitable geometries.
Which Is Better for Complex Geometry?
Injection molding is usually more practical when the part depends on several integrated three-dimensional features. A rib can reinforce a wall without adding a large solid section. A boss can provide a controlled screw location. A snap fit can be formed directly into the housing.
Vacuum forming can accommodate some detail, but the sheet still has to stretch over the tool, and the opposite surface is not defined in the same way as a closed injection cavity.
The difference becomes important when a feature affects assembly. A connector opening that only needs a cutout is very different from an interface that must repeatedly locate a connector against a PCB and enclosure.
How Does Wall Thickness Affect the Decision?
In vacuum forming, the starting sheet is stretched during forming, so areas undergoing greater deformation can become much thinner. Injection molding gives more control over local wall geometry, although large thickness changes can still affect filling, cooling, shrinkage, sink, and warpage.
A simplified thermoforming calculation illustrates the issue. Suppose a 150 × 100 mm sheet starts at 2 mm thickness and is formed into a 150 × 100 × 60 mm rectangular box.
Using a simplified surface-area assumption:
Initial volume = 150 × 100 × 2 = 30,000 mm³
Approximate formed surface area = 45,000 mm²
Average thickness = 30,000 / 45,000 ≈ 0.67 mm
This simplified calculation assumes an idealized box surface and does not represent the actual thickness distribution of a thermoformed part. Corner radii, flange material, trimming allowance, draw geometry, and nonuniform stretching all affect the finished wall.
The example shows why a nominal 2 mm sheet should not be treated as a guaranteed 2 mm finished wall.
Which Process Gives Better Dimensional Control?
Injection molding can provide more repeatable molded features when resin behavior, tooling, cooling, geometry, and process conditions are well controlled. Vacuum-formed dimensions are affected by sheet behavior, heating uniformity, forming depth, tool geometry, cooling, and trimming.
For a critical dimension, define what actually matters to the assembly. A tight requirement on a cosmetic outer surface may have little practical value, while the same variation at a connector interface could affect fit.
For an RFQ, identify the dimensions that affect fit, assembly, sealing, motion, or function instead of applying tight tolerances to the entire part.
How Do Materials Differ Between the Two Processes?
Material selection is closely tied to the forming or molding process. Vacuum forming uses an extruded thermoplastic sheet with its own thickness, orientation, forming window, and thermal history. Injection molding uses a resin grade that is melted and processed through a mold.
Review:
- Mechanical requirements
- Impact resistance
- Temperature exposure
- Chemical environment
- Appearance
- Available grades
- Production material requirements
- Required testing
A prototype material can validate enclosure fit or appearance without being identical to the final production resin. The production grade and its processing behavior should be reviewed again before production tooling.
What About Surface Finish and Appearance?
Surface appearance depends on the tooling surface, material, process conditions, and secondary operations.
For vacuum forming, review the mold-contacting surface, visible trim edges, openings, and areas where the sheet may stretch differently. Conventional single-sided thermoforming directly defines one surface against the mold; the opposite surface is influenced by sheet behavior.
Injection molding introduces different cosmetic considerations:
- Parting lines
- Gate vestige
- Ejector marks
- Weld lines
- Sink marks
- Mold texture
- Gloss variation
- Flow-related appearance
If a surface is visible to the customer or mates with another component, identify it during the drawing or CAD review.
Is Vacuum Forming Cheaper Than Injection Molding?
Vacuum forming can be cheaper for lower-volume work because the initial tooling investment is often lower, but the finished-part cost depends on what happens after forming. Trimming, CNC machining, drilling, hardware, assembly, inspection, scrap, and material utilization can change the economics.
Why Tooling Cost Does Not Tell the Whole Story
Compare the complete manufacturing route:
Total Manufacturing Cost = Tooling + Material + Forming/Molding + Secondary Operations + Scrap + Inspection + Assembly + Logistics
A vacuum-formed enclosure may need CNC trimming around openings, drilling, inserts, hardware, surface finishing, or manual assembly. An injection-molded enclosure may carry a higher tooling cost while eliminating some recurring machining and assembly operations.
Mastars’ published digital mixer chassis project also covers controlled openings and interfaces together with finishing, assembly, and inspection rather than treating the primary manufacturing operation as the complete production route.
At What Production Volume Does Injection Molding Become More Economical?
There is no universal cutoff such as “3,000 parts” or “5,000 parts.” The crossover depends on the specific part and its manufacturing route.
Use:
Breakeven Quantity =
(Injection Tooling Cost − Vacuum Tooling Cost) ÷
(Vacuum Unit Cost − Injection Unit Cost)
For an illustrative example, assume:
- Vacuum-forming tooling = $8,000
- Injection-molding tooling = $35,000
- Vacuum-forming recurring cost = $14/part
- Injection-molding recurring cost = $5/part
Then:
Breakeven Quantity = ($35,000 − $8,000) ÷ ($14 − $5)
= $27,000 ÷ $9
= 3,000 parts
At approximately 3,000 parts, the simplified manufacturing costs would be equal.
The result changes with tooling cost, unit cost, trimming, material price, secondary operations, scrap rate, and expected production quantity. Use project-specific quotations rather than a generic volume threshold.
Which Process Should You Choose for Your Part?
Start with the features that are difficult or expensive to manufacture after forming. A large shell with simple edges may point toward vacuum forming. A housing whose function depends on bosses, ribs, clips, locating features, and repeatable connector interfaces deserves an injection-molding review.
| If your part needs… | Start by evaluating… |
|---|---|
| Large, relatively simple shell | Vacuum forming |
| Low initial tooling investment | Vacuum forming |
| Frequent early design changes | Vacuum forming |
| Deep formed surfaces | Vacuum forming, pressure forming, or plug-assisted forming |
| Integrated ribs and bosses | Injection molding |
| Snap fits and clips | Injection molding |
| Controlled mating interfaces | Injection molding |
| High repeatability | Injection molding |
| Large volume with stable geometry | Injection molding |
| Large part at moderate volume | Compare vacuum/pressure forming against injection molding |
A practical process review can follow these steps:
- Mark critical interfaces. Identify dimensions that affect fit, connectors, fasteners, seals, or assembly.
- Separate molded features from secondary features. Decide which ribs, bosses, openings, and mounting details need to be created during forming or molding.
- Check wall distribution. For thermoforming, review where the sheet will stretch. For injection molding, review thick-to-thin transitions and cooling.
- Estimate production volume. Separate prototype quantity from expected recurring demand.
- Build the cost model. Include tooling, unit cost, trimming, machining, assembly, inspection, and scrap.
- Review material and testing requirements.
- Review production risks. Consider warpage, shrinkage, dimensional variation, cosmetic requirements, and ejection.
Depending on geometry and production requirements, the comparison may also include pressure forming, plug-assisted thermoforming, or another low-volume process.
When Should You Start With Vacuum Forming and Move to Injection Molding?
A process change makes sense when the product requirements change. Early prototypes may need to answer questions about enclosure size, component fit, appearance, or connector positioning. Production parts have a different burden: repeatability, stable dimensions, final material, inspection, recurring cost, and process control.
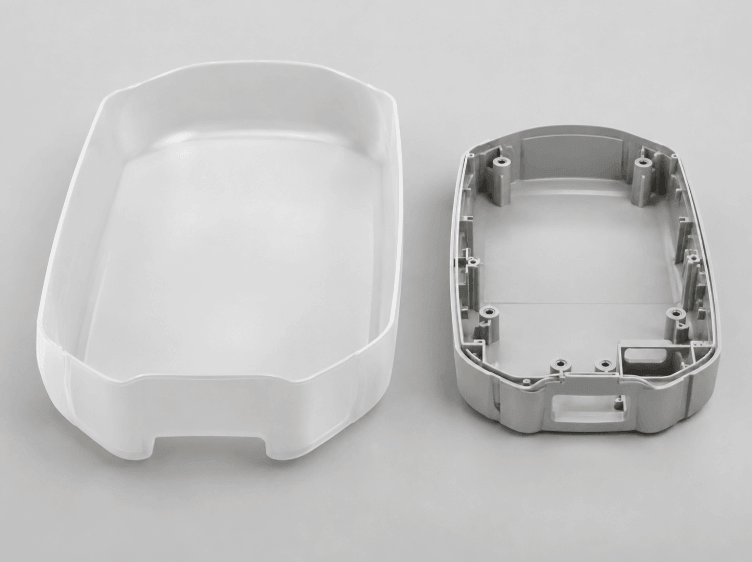
Plastic enclosure prototype transitioning from vacuum forming to injection molding
What Can Vacuum Forming Validate Early?
For a large enclosure, a formed prototype can answer practical questions before production tooling is committed:
- Does the PCB fit?
- Are connector openings in the right locations?
- Does the enclosure close correctly?
- Are components accessible?
- Is the overall shape acceptable?
- Does the assembly sequence work?
- Are the visible surfaces acceptable?
The multi-port USB charger project follows this type of staged validation. The published route includes prototype validation for appearance, interface positioning, PCB accommodation, enclosure fit, and assembly relationships before injection-molding DFM and tooling.
Why Does Prototype Approval Not Mean Production Readiness?
A prototype can prove that the product concept works without proving that the same geometry is ready for stable injection molding.
Before tooling, review:
- Wall thickness
- Draft angles
- Ribs and bosses
- Parting lines
- Gate location
- Ejection
- Shrinkage
- Cooling
- Warpage
- Critical dimensions
- Cosmetic surfaces
Mastars’ published USB charger project moves from prototype validation into injection-molding DFM, tooling and trial molding, and then repeat production.
The production review should confirm that the final geometry, material, tooling strategy, inspection requirements, and recurring cost are all aligned.
When Should the Process Change?
Change the process when the validation objective no longer matches the production requirement.
A practical development path is:
Concept → Prototype → Functional Validation → Process Review → Production Process
The production process does not automatically have to be injection molding. CNC machining, vacuum forming, pressure forming, vacuum casting, and other low-volume methods may remain appropriate depending on the part.
Common Mistakes When Choosing Between Vacuum Forming and Injection Molding
The most common selection mistakes come from evaluating one cost or one process feature without checking the complete manufacturing route.
1. Choosing Based Only on Tooling Price
A lower-cost forming tool can lose its advantage if every part requires extensive trimming, CNC machining, hardware, or assembly.
2. Using a Fixed Volume Threshold
A volume number without actual tooling and recurring costs tells you little about the project. Calculate the breakeven point for the specific geometry.
3. Ignoring Secondary Operations
Connector openings, inserts, drilling, trimming, finishing, inspection, and assembly all belong in the cost comparison.
4. Treating Sheet Thickness as Final Wall Thickness
A 2 mm or 3 mm starting sheet does not guarantee a 2 mm or 3 mm finished wall. Draw depth and local stretching change the final thickness.
5. Adding Thick Ribs or Bosses Without Checking Sink Risk
In injection molding, adding material to reinforce a wall can create a heavy section that cools differently from the surrounding geometry. Properly designed ribs and gussets usually provide better structural efficiency.
6. Applying Tight Tolerances to Every Dimension
Tolerances should follow function. Tight control is most valuable at interfaces that affect fit, assembly, sealing, or motion.
7. Treating Prototype Material as Production Material
A prototype route may use a material selected for speed, appearance, machinability, or availability. Production should be evaluated against the final material grade and its processing behavior.
8. Confusing Vacuum Forming With Vacuum Casting
Vacuum forming shapes heated plastic sheet. Vacuum casting uses liquid resin and a mold. Injection molding melts thermoplastic resin and injects it into a production mold.
Vacuum Forming vs Vacuum Casting vs Injection Molding
These processes can all appear in prototype and low-volume manufacturing discussions, but they start from different materials and use different tooling principles.
| Process | Starting Material | Tooling | Typical Use |
|---|---|---|---|
| Vacuum Forming | Thermoplastic sheet | Forming mold | Large shells, covers, panels, enclosures |
| Vacuum Casting | Liquid resin | Silicone mold | Low-volume prototypes and functional/appearance parts |
| Injection Molding | Thermoplastic resin | Injection mold | Repeatable production parts and feature-rich housings |
The distinction matters when requesting a quote. A formed shell, resin-cast prototype, and production-grade molded component have different tooling, material, geometry, and cost requirements.
What Should You Include When Requesting a Quote?
A useful RFQ should give the manufacturer enough information to compare processes against the actual part. You do not need a perfect production package to start; a CAD model, approximate quantity, material requirement, and a few critical requirements are enough to begin a technical discussion.
Include:
- 3D CAD: Overall geometry and interfaces.
- 2D drawing: Critical dimensions and tolerances.
- Critical dimensions: Mark features that affect fit, assembly, sealing, or function.
- Material and grade: State the required production material where known.
- Surface requirements: Identify cosmetic surfaces, texture, gloss, or visible interfaces.
- Initial quantity: Number of parts required for the first order.
- Expected production volume: Helps establish tooling economics.
- Assembly requirements: Explain how the part connects to other components.
- Testing requirements: Include functional, dimensional, environmental, or other testing.
- Target lead time: Helps determine whether the proposed tooling route fits the project schedule.
If the design is still developing, rough information is fine to start. The critical information is whatever could change the manufacturing route.
Conclusion
For large, thin-walled shells with relatively simple geometry, vacuum forming can reduce the initial tooling burden. For parts that depend on molded-in ribs, bosses, clips, snap fits, and controlled interfaces, injection molding may provide a more practical production route.
The decision should be based on the complete manufacturing route, including tooling, material, secondary operations, tolerances, production volume, and inspection requirements.
A prototype can validate fit and function, but the production process still requires a separate DFM and cost review.
Send your CAD model, material requirements, critical dimensions, expected quantity, and surface requirements. If you are deciding between vacuum forming and injection molding, include the features that affect fit, assembly, and production cost.
FAQ
Is vacuum forming cheaper than injection molding?
Often at lower volumes, but not automatically. Vacuum forming usually has a lower initial tooling cost, while injection molding can reduce recurring operations and unit cost when production volume and geometry justify the mold investment.
At what production volume does injection molding become cheaper?
There is no universal cutoff. The breakeven point depends on tooling cost, unit cost, part geometry, material, trimming, machining, and expected production quantity.
Is vacuum forming suitable for large plastic parts?
Yes. Large covers, panels, trays, and relatively simple enclosures are common applications. Deep draws and structural wall requirements need closer review because sheet stretching changes the final wall thickness.
Which process provides tighter tolerances?
Injection molding generally provides more repeatable molded features, but the achievable result depends on resin, geometry, tooling, cooling, shrinkage, and process control. Critical dimensions should be identified individually rather than assigning unnecessarily tight tolerances to the whole part.
Can vacuum forming produce ribs, bosses, and snap fits?
Some features are possible, but extensive integrated features usually favor injection molding. If those features can be machined or assembled after forming, vacuum forming may still be viable; the additional operations should be included in the cost comparison.
Can I start with vacuum forming and switch to injection molding later?
Yes. Vacuum-formed or other low-volume prototypes can validate fit, appearance, component clearance, and assembly before production tooling. The design still needs an injection-molding DFM review before the mold is built.
Is vacuum forming the same as vacuum casting?
No. Vacuum forming shapes heated plastic sheet. Vacuum casting uses liquid resin in a mold. Injection molding melts thermoplastic resin and injects it into a production mold.
Hot Articles
Hot Tags
Stay Connected!


Manufacturing on Demand
Please fill in the following information to obtain plan details (information is confidential and not disclosed publicly), we will contact you within 24 hours, please keep your phone available!
Upload a 3D/2D model to see instant pricing, lead time, and DFM feedback.